Everything You Need to Know About Selling on Poshmark in 2022
This is not a sponsored post! If you use my referral code HAHLGREN you will receive $15 off your first order and I will receive some rewards on my account.
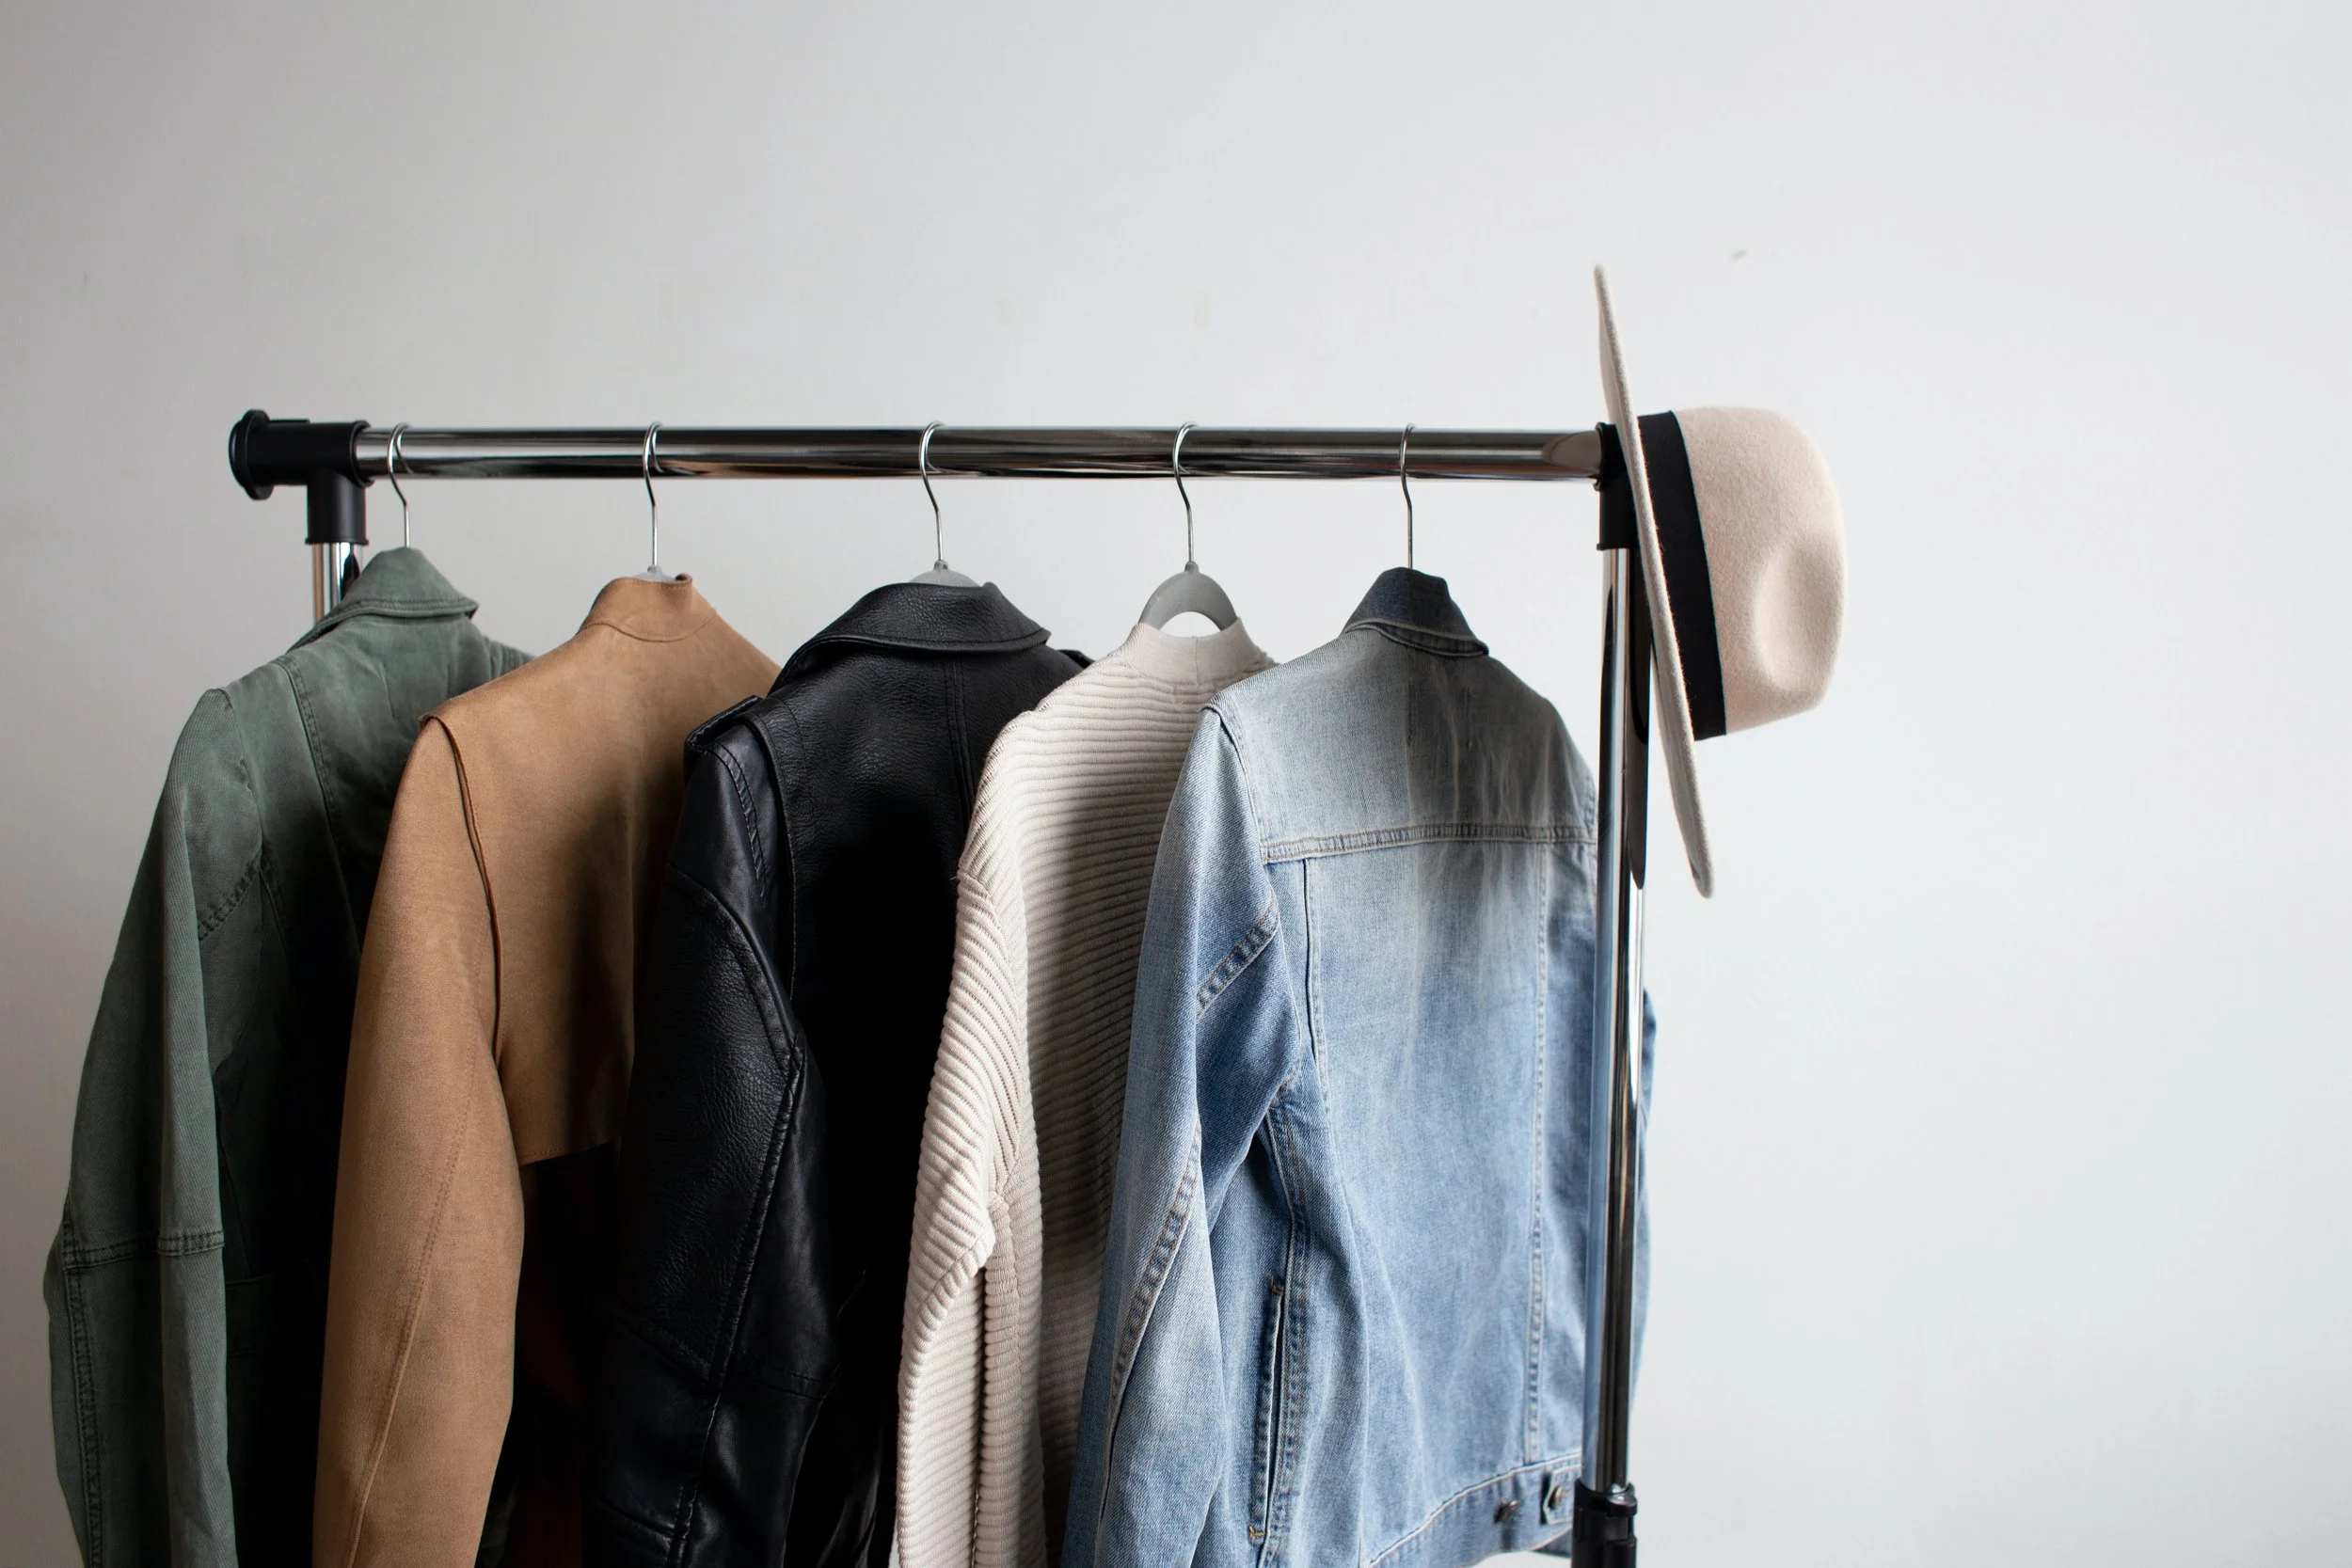
After working from home for over a year and fully embracing loungewear, I decided it was time to do a complete closet overhaul. My style had changed, my body had changed, and I was tired of sifting through a closet full of clothes that no longer served me. I already had a closet full of perfectly good gently used pieces to get rid of, and I knew I had to find a way to swap stuff out without breaking the bank.
Enter Poshmark.
In the last 9 months I have made almost $3000 profit by selling clothes on Poshmark (that’s more than $300 every month)! I’ve been so excited by my ability to sell stuff online with nothing more than my phone. I will share with you all of my tips and tricks, right down to the teeny tiny details that help make my listings shine. I am located in Canada, so these are my experiences with the Canadian website but it should be the same for other countries too!
In this article:
What is Poshmark?
Poshmark is an online platform where you can buy and sell items from your closet. Clothes and accessories are the biggest categories, but there are also beauty products, home goods, and tons of other stuff. Currently the platform does not allow cross/border transactions, so Canadian buyers shop from Canadian sellers on the .ca website, and US buyers shop from US sellers on the .com website. Poshmark takes a 20% cut from every sale made through their platform.
Choose the items you want to sell
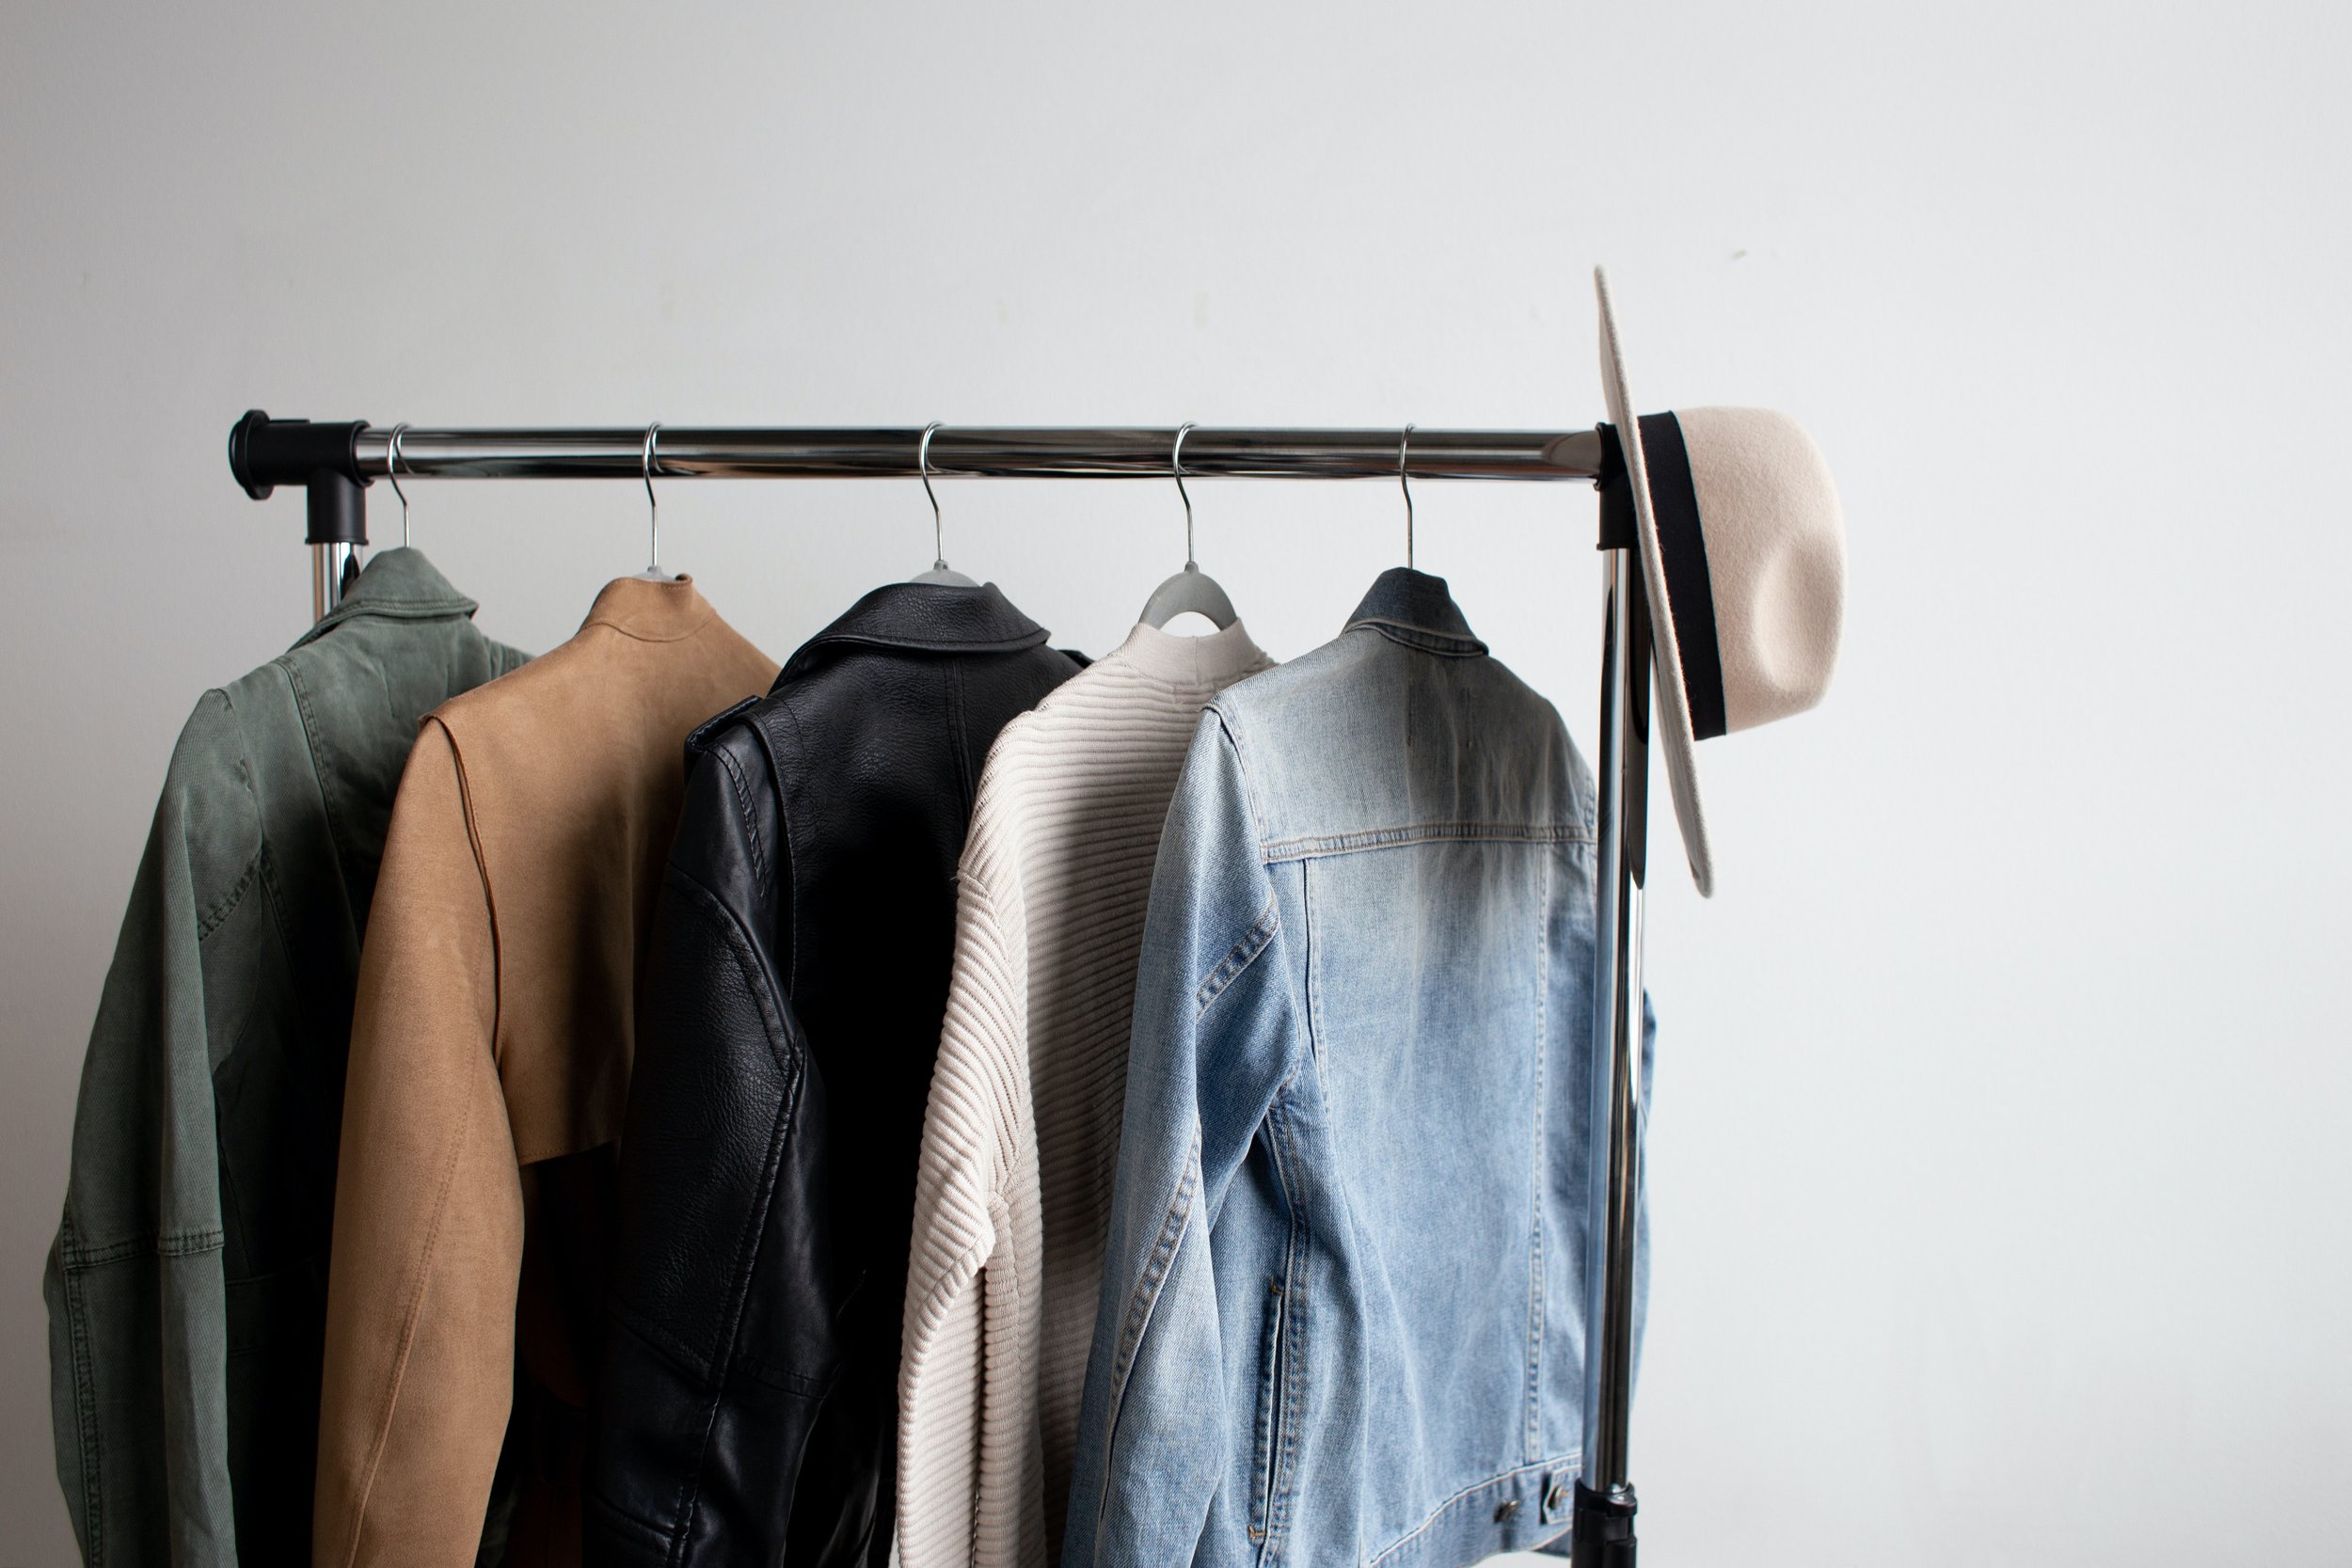
Anything in your closet has the potential to make you some money on Poshmark! Most buyers filter by brand when shopping, so the items most likely to sell are those with a brand name (sorry, locally made items). I have had the best luck with Lululemon, Nike, and Aritzia. You can also check out the Poshmark Trend Report to see what brands sell the best on Poshmark.
Choose pieces that still have life left in them for your best chances at a sale. Things that are like-new will sell faster and for more money than items that show signs of wear. You can also try to sell damaged pieces (especially if they are brand name), but make sure that you disclose everything that’s wrong with them in your listing. For example, my husband sold a pair of Naked and Famous jeans that had a big hole in them for $20. (I will explain later how I price my listings!)
Start with items that are in season since most poshers are looking for items that they need NOW. You’re better to wait until November to sell your winter parka, and should post your summer dresses in May as the weather warms up.
What not to sell: From my experience, I have the most difficulty selling pants even when they are in like-new condition. I also have trouble selling Banana Republic items; even though it is a brand name, there are a lot of the same items on Poshmark so these become harder to sell!
Creating your listings
I keep the same structure for each listing to make it as informative as possible. It may seem tedious, but having all the details upfront will increase the chance that someone will click that BUY button. Including more details in your listing also increases the likelihood that your item will show up in search results.
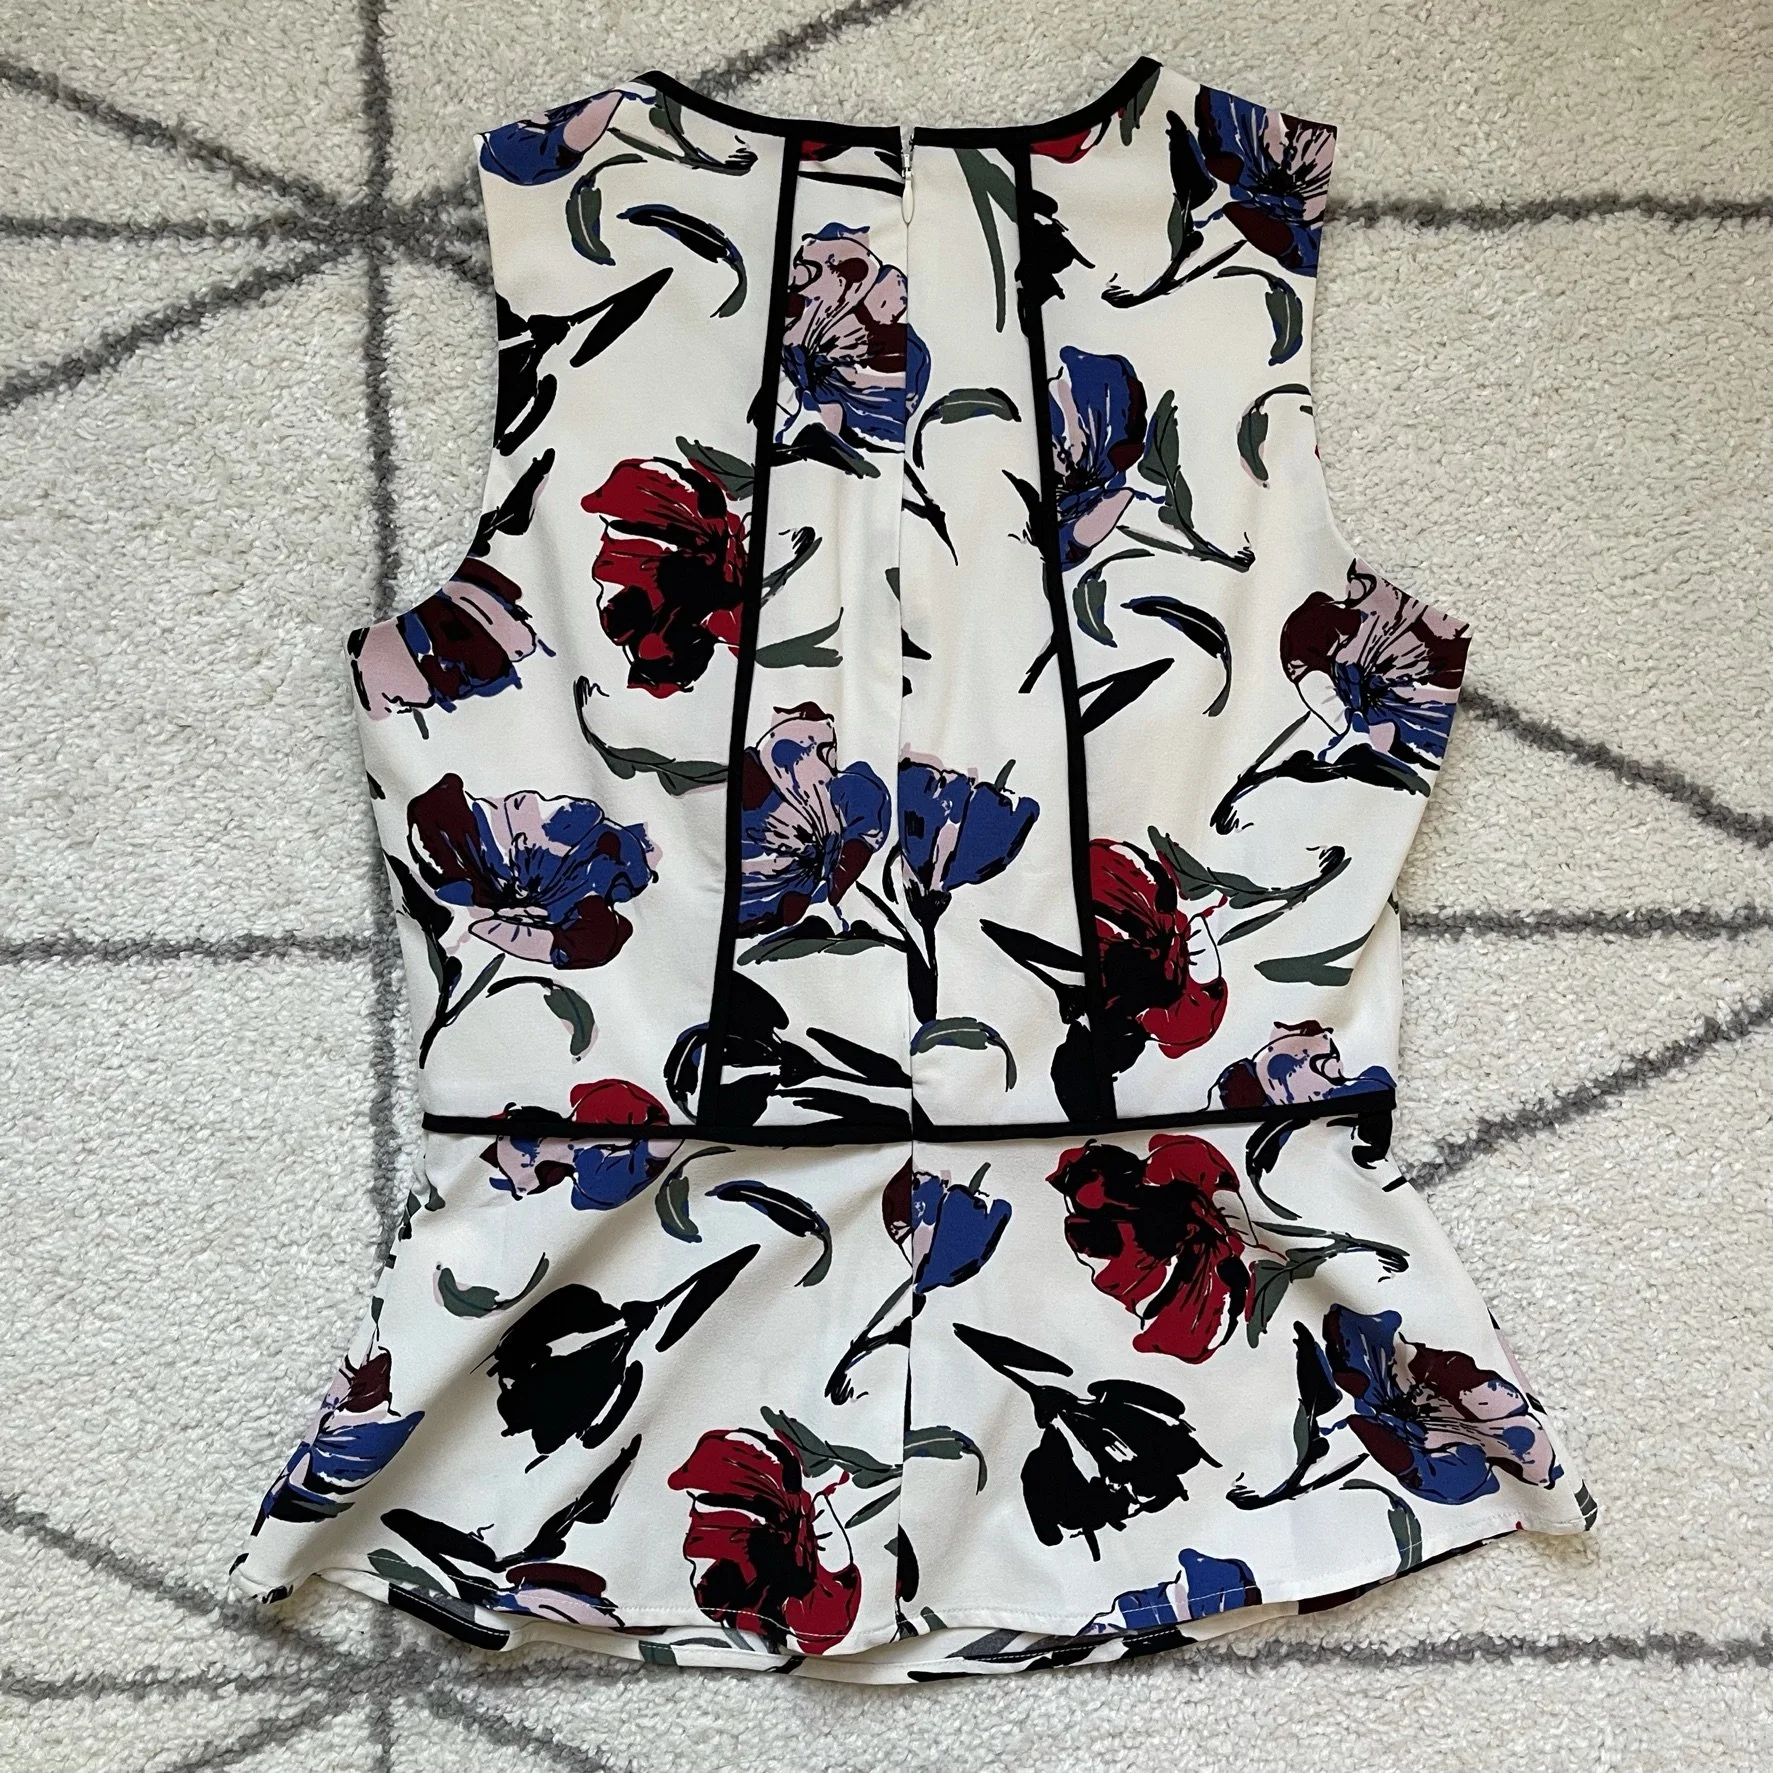
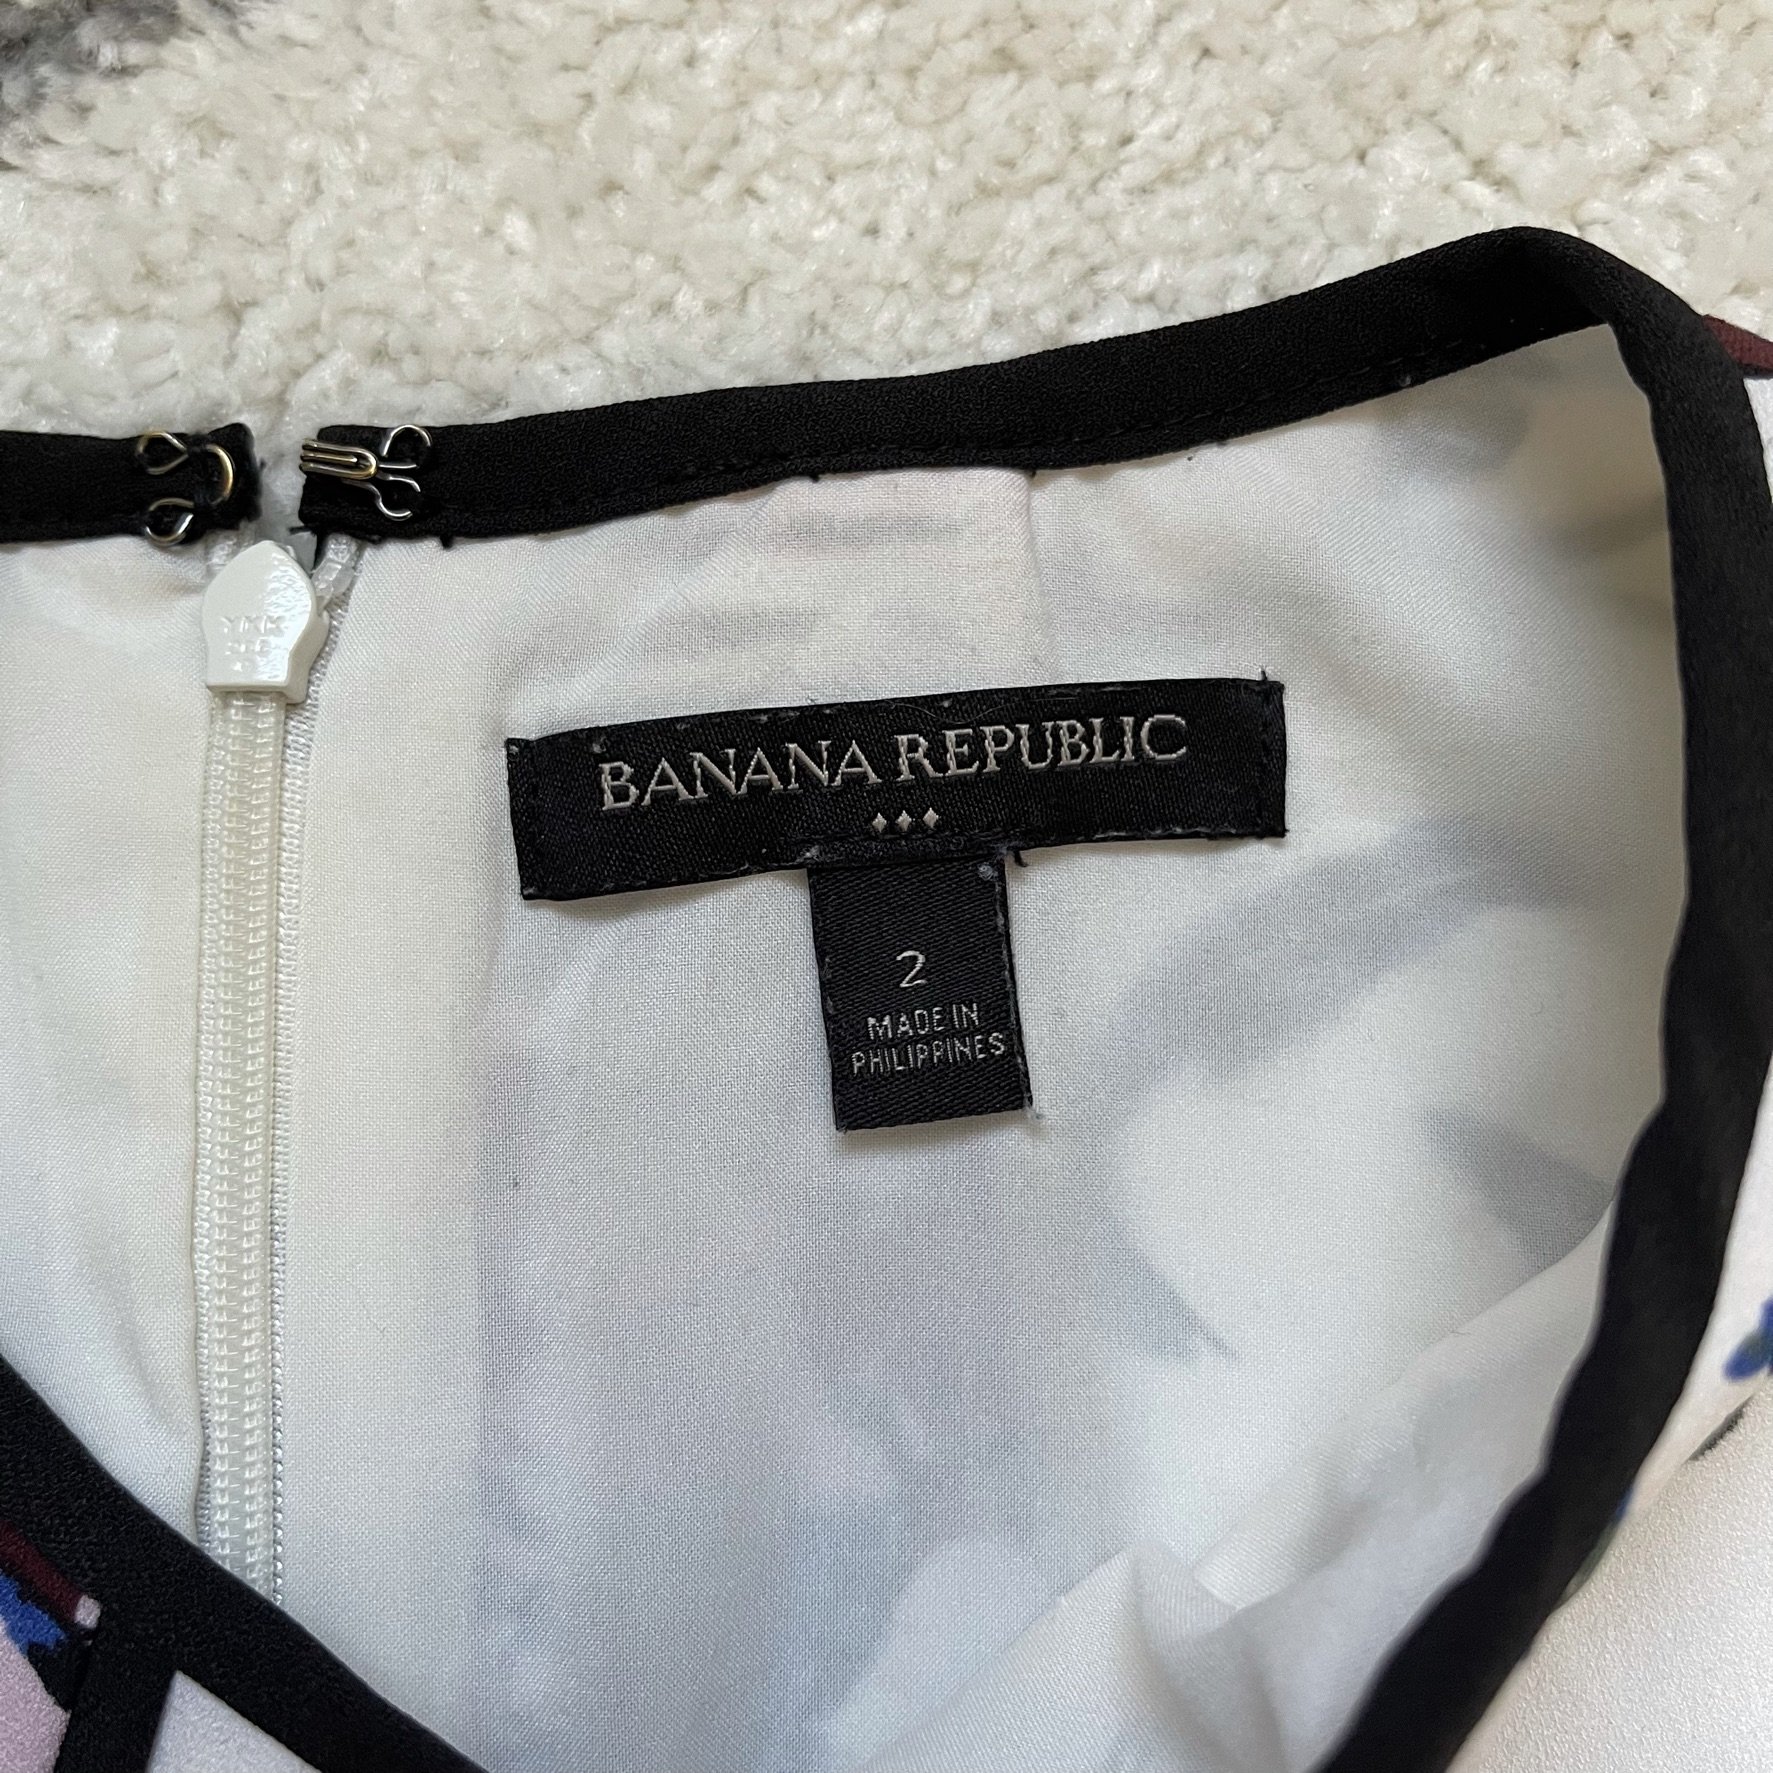
Take (lots of!) well lit pictures
Most buyers are generally not interested in buying anything that has only one dimly lit photo. Many people don’t trust listings that don’t have photos, even if they know they want the item. Buyers are more likely to make a purchase AND to pay more money for items that have a lot of good photos. You are allowed to include 17 photos and 1 video in each listing, and I suggest to add as many photos as possible. More is better!
At minimum, I always have the following photos for each item:
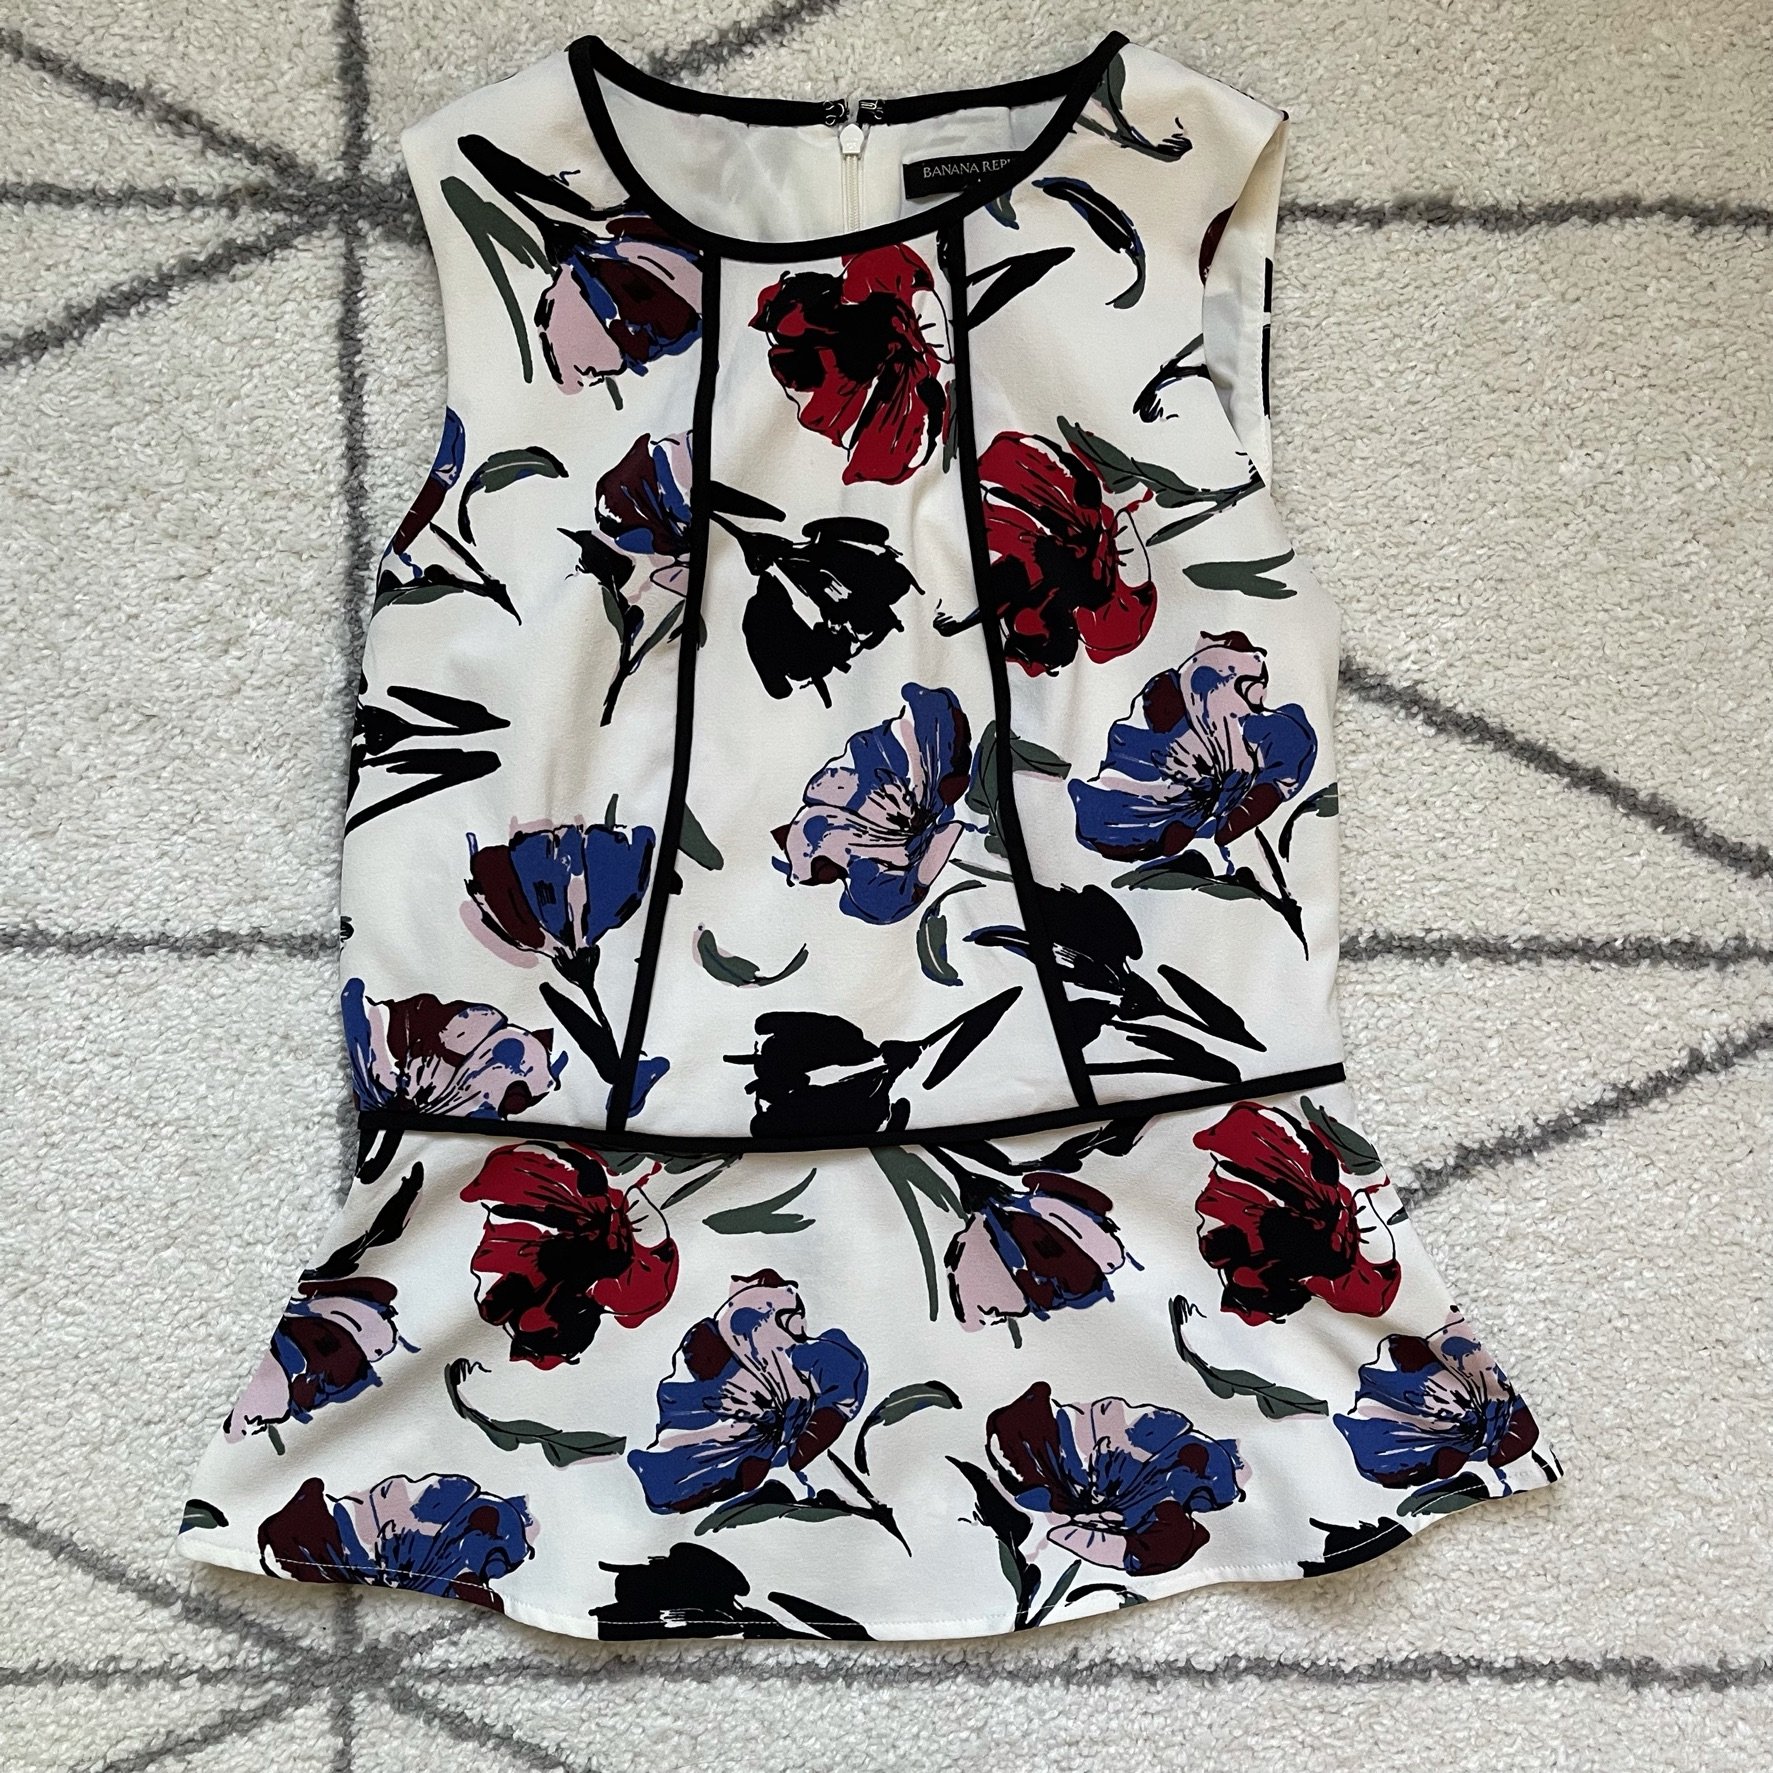
Front of whole piece
Back of whole piece
Tags (size, brand, style)
Fabric contents tag
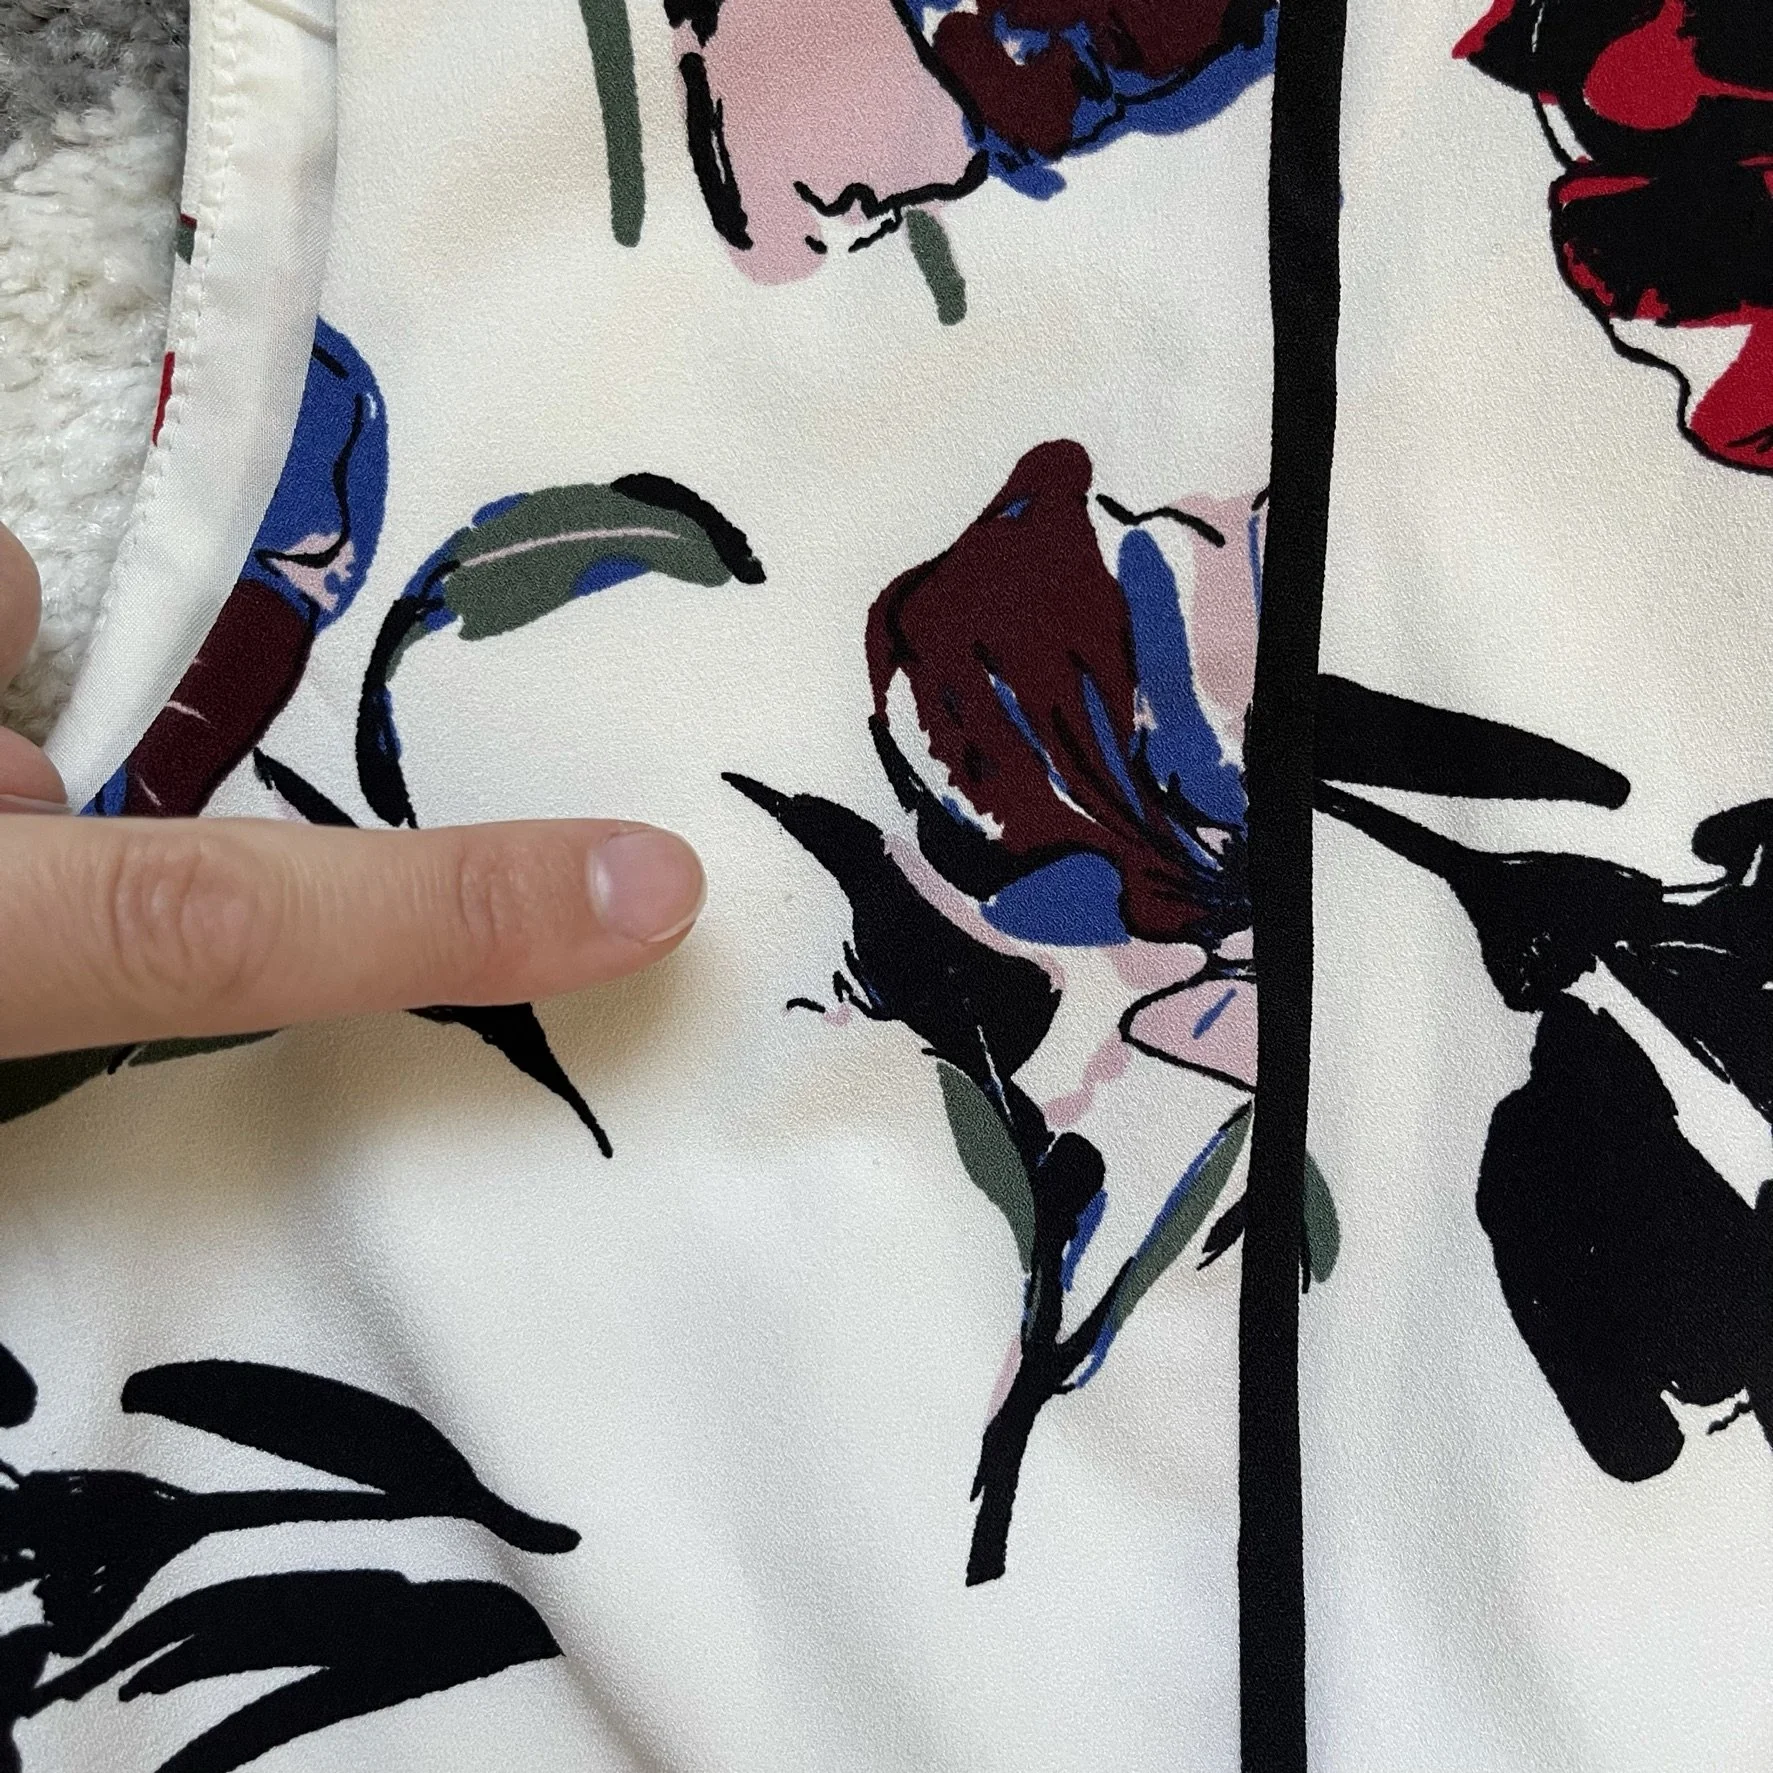
Detail pictures (hems, stitching, pockets)
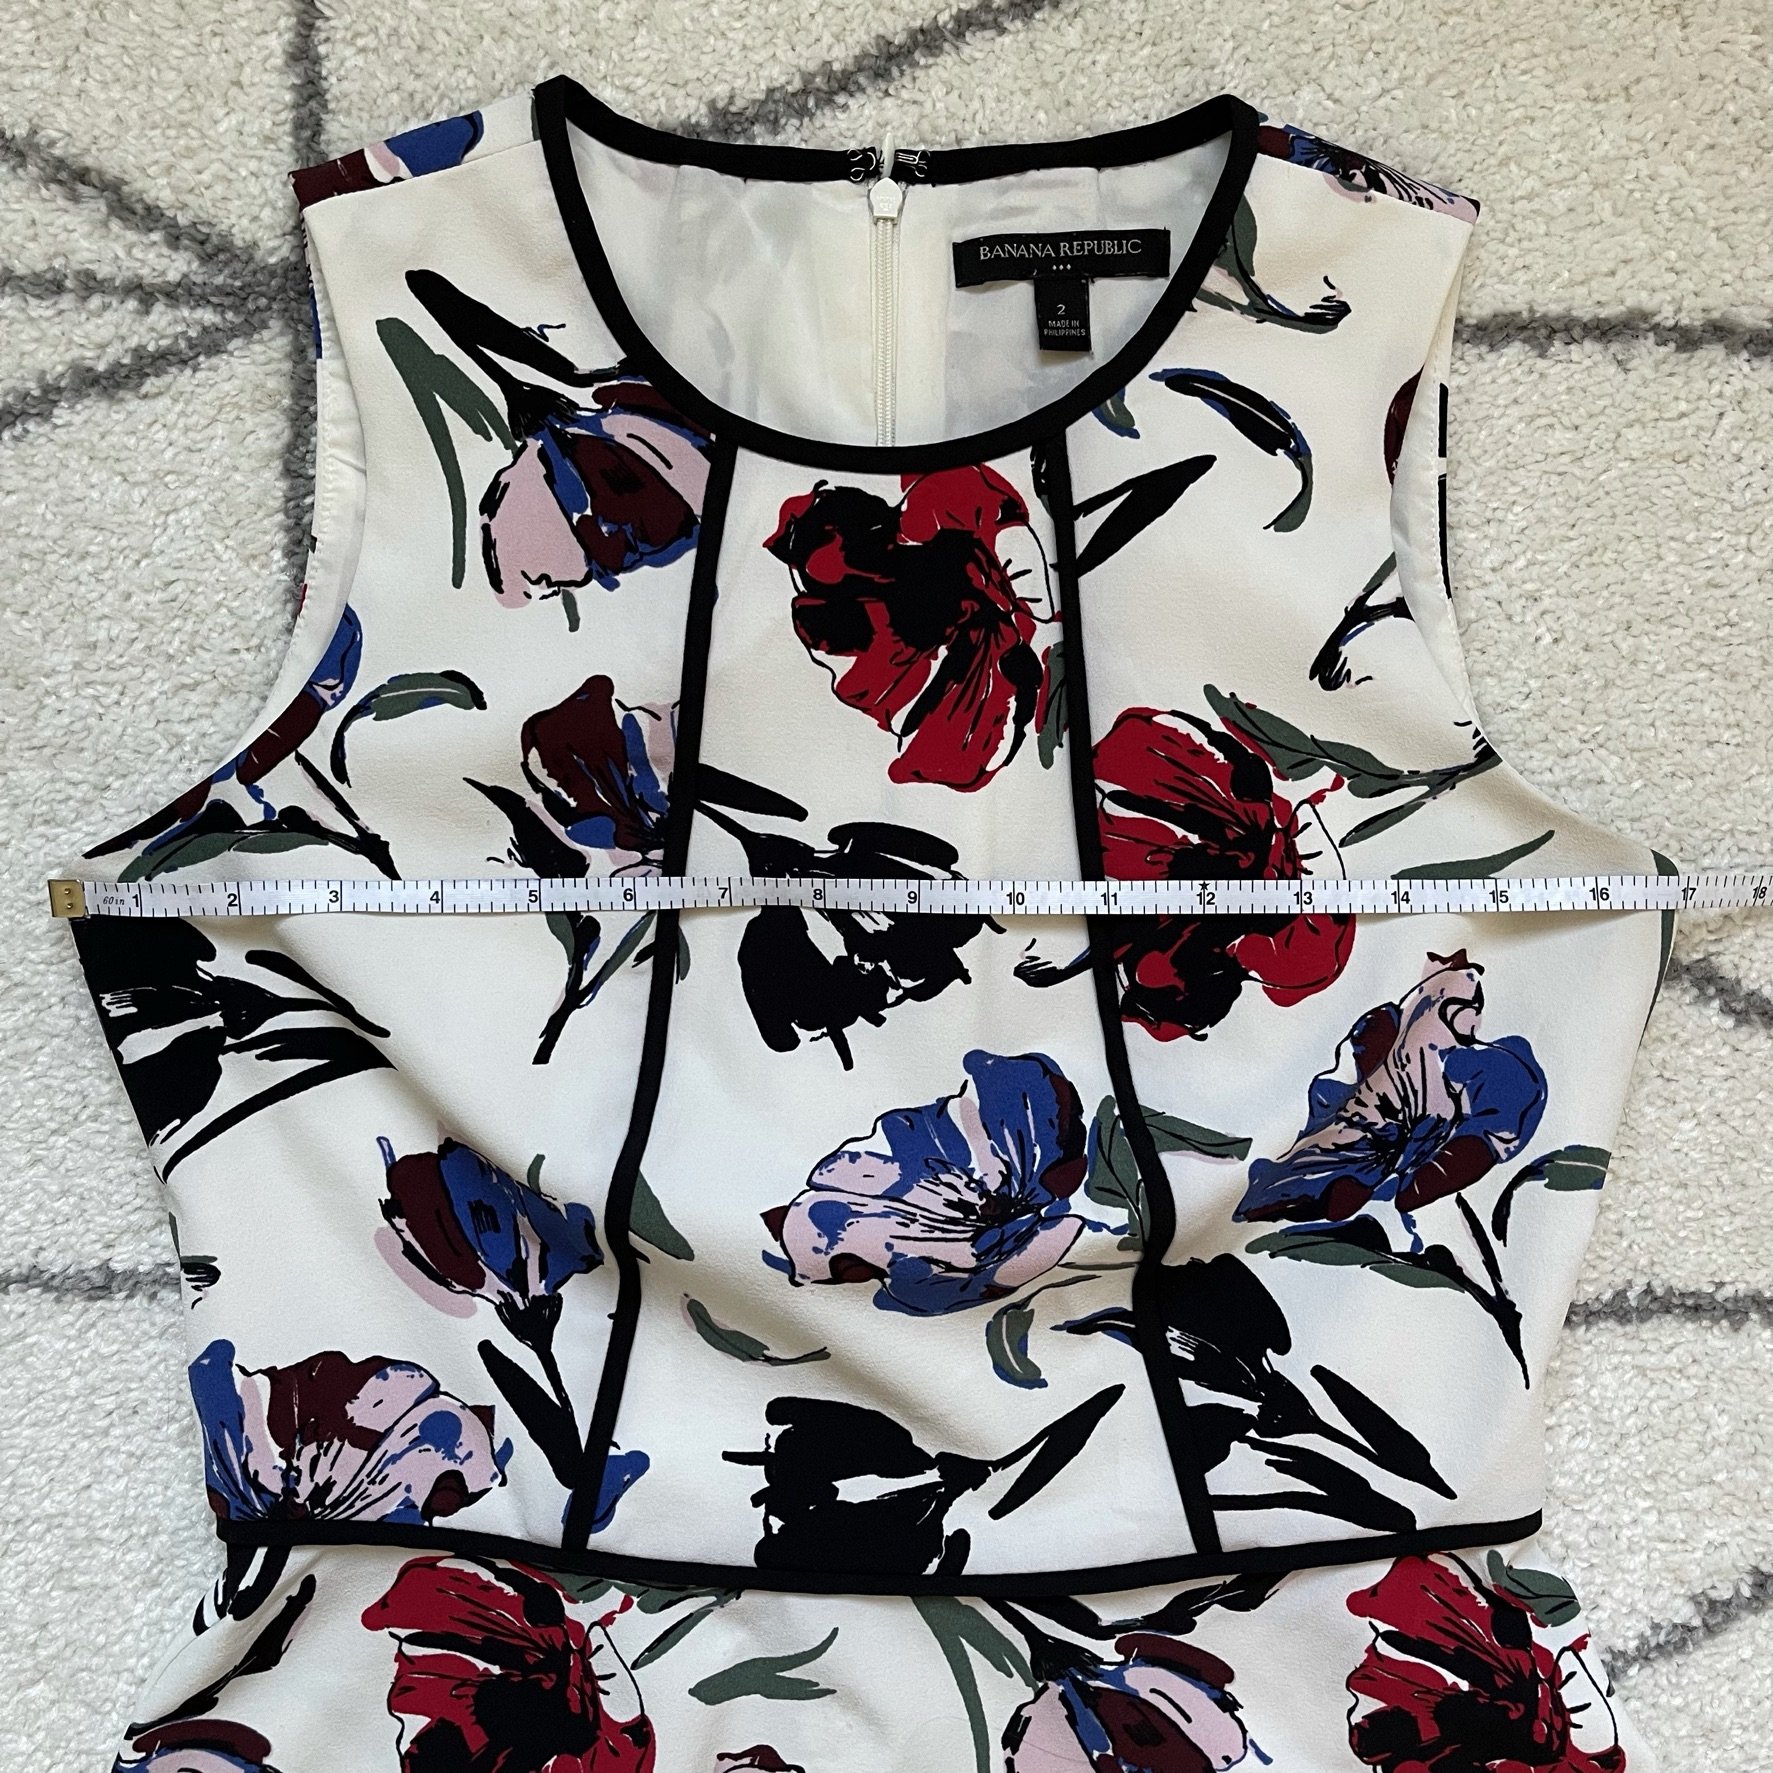
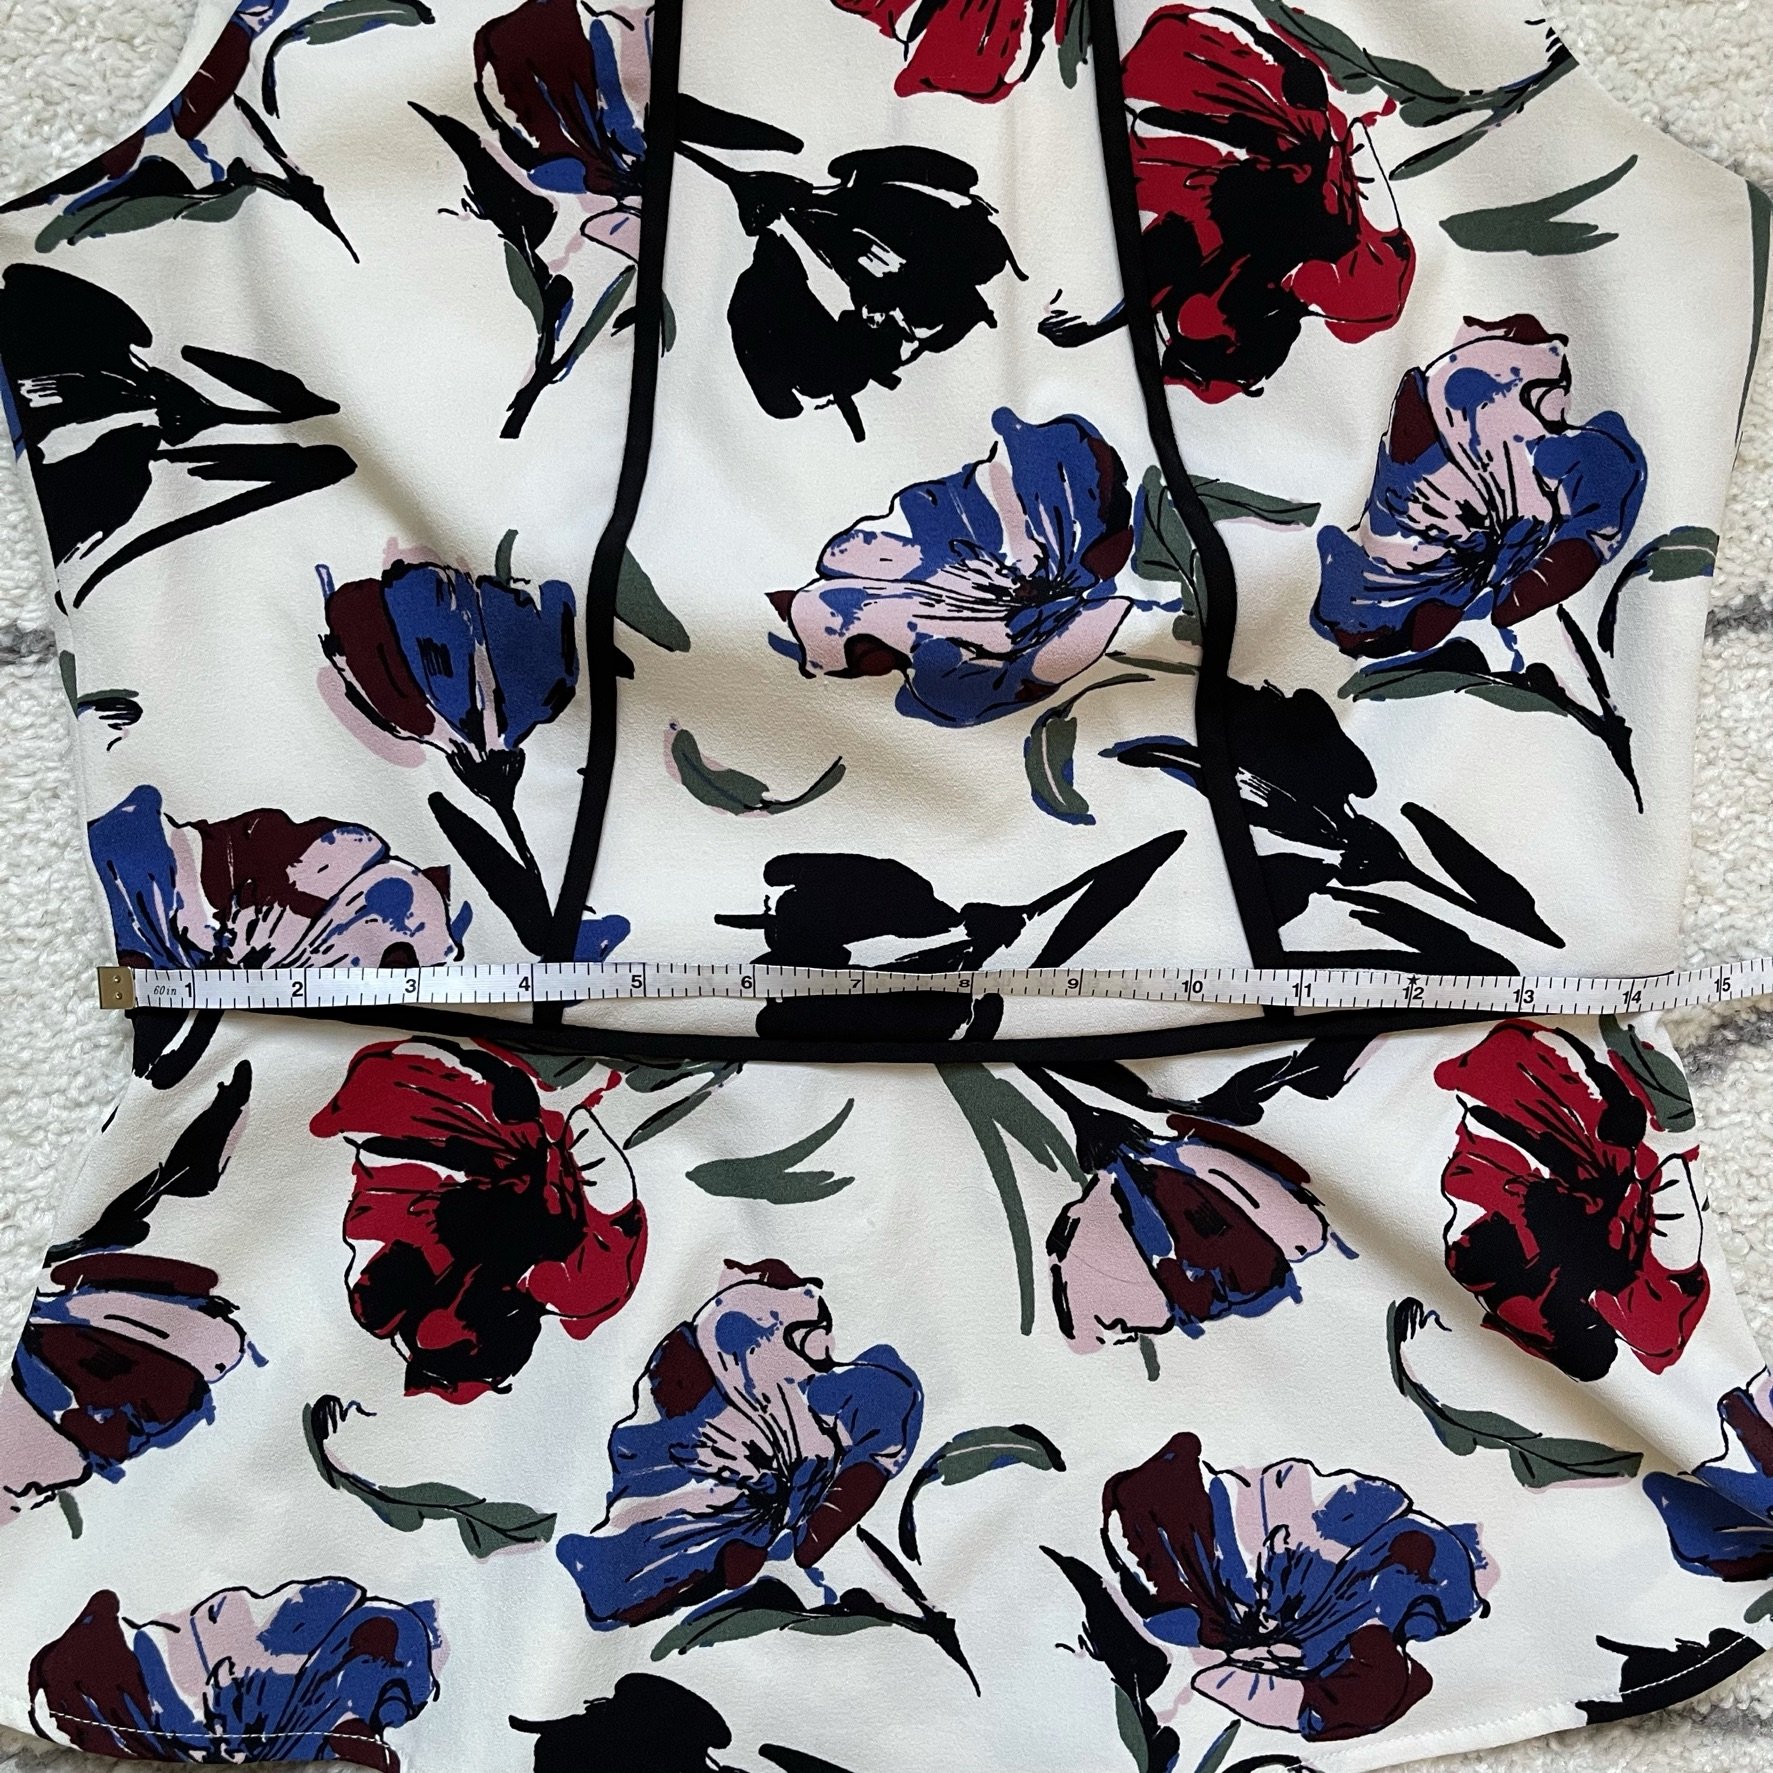
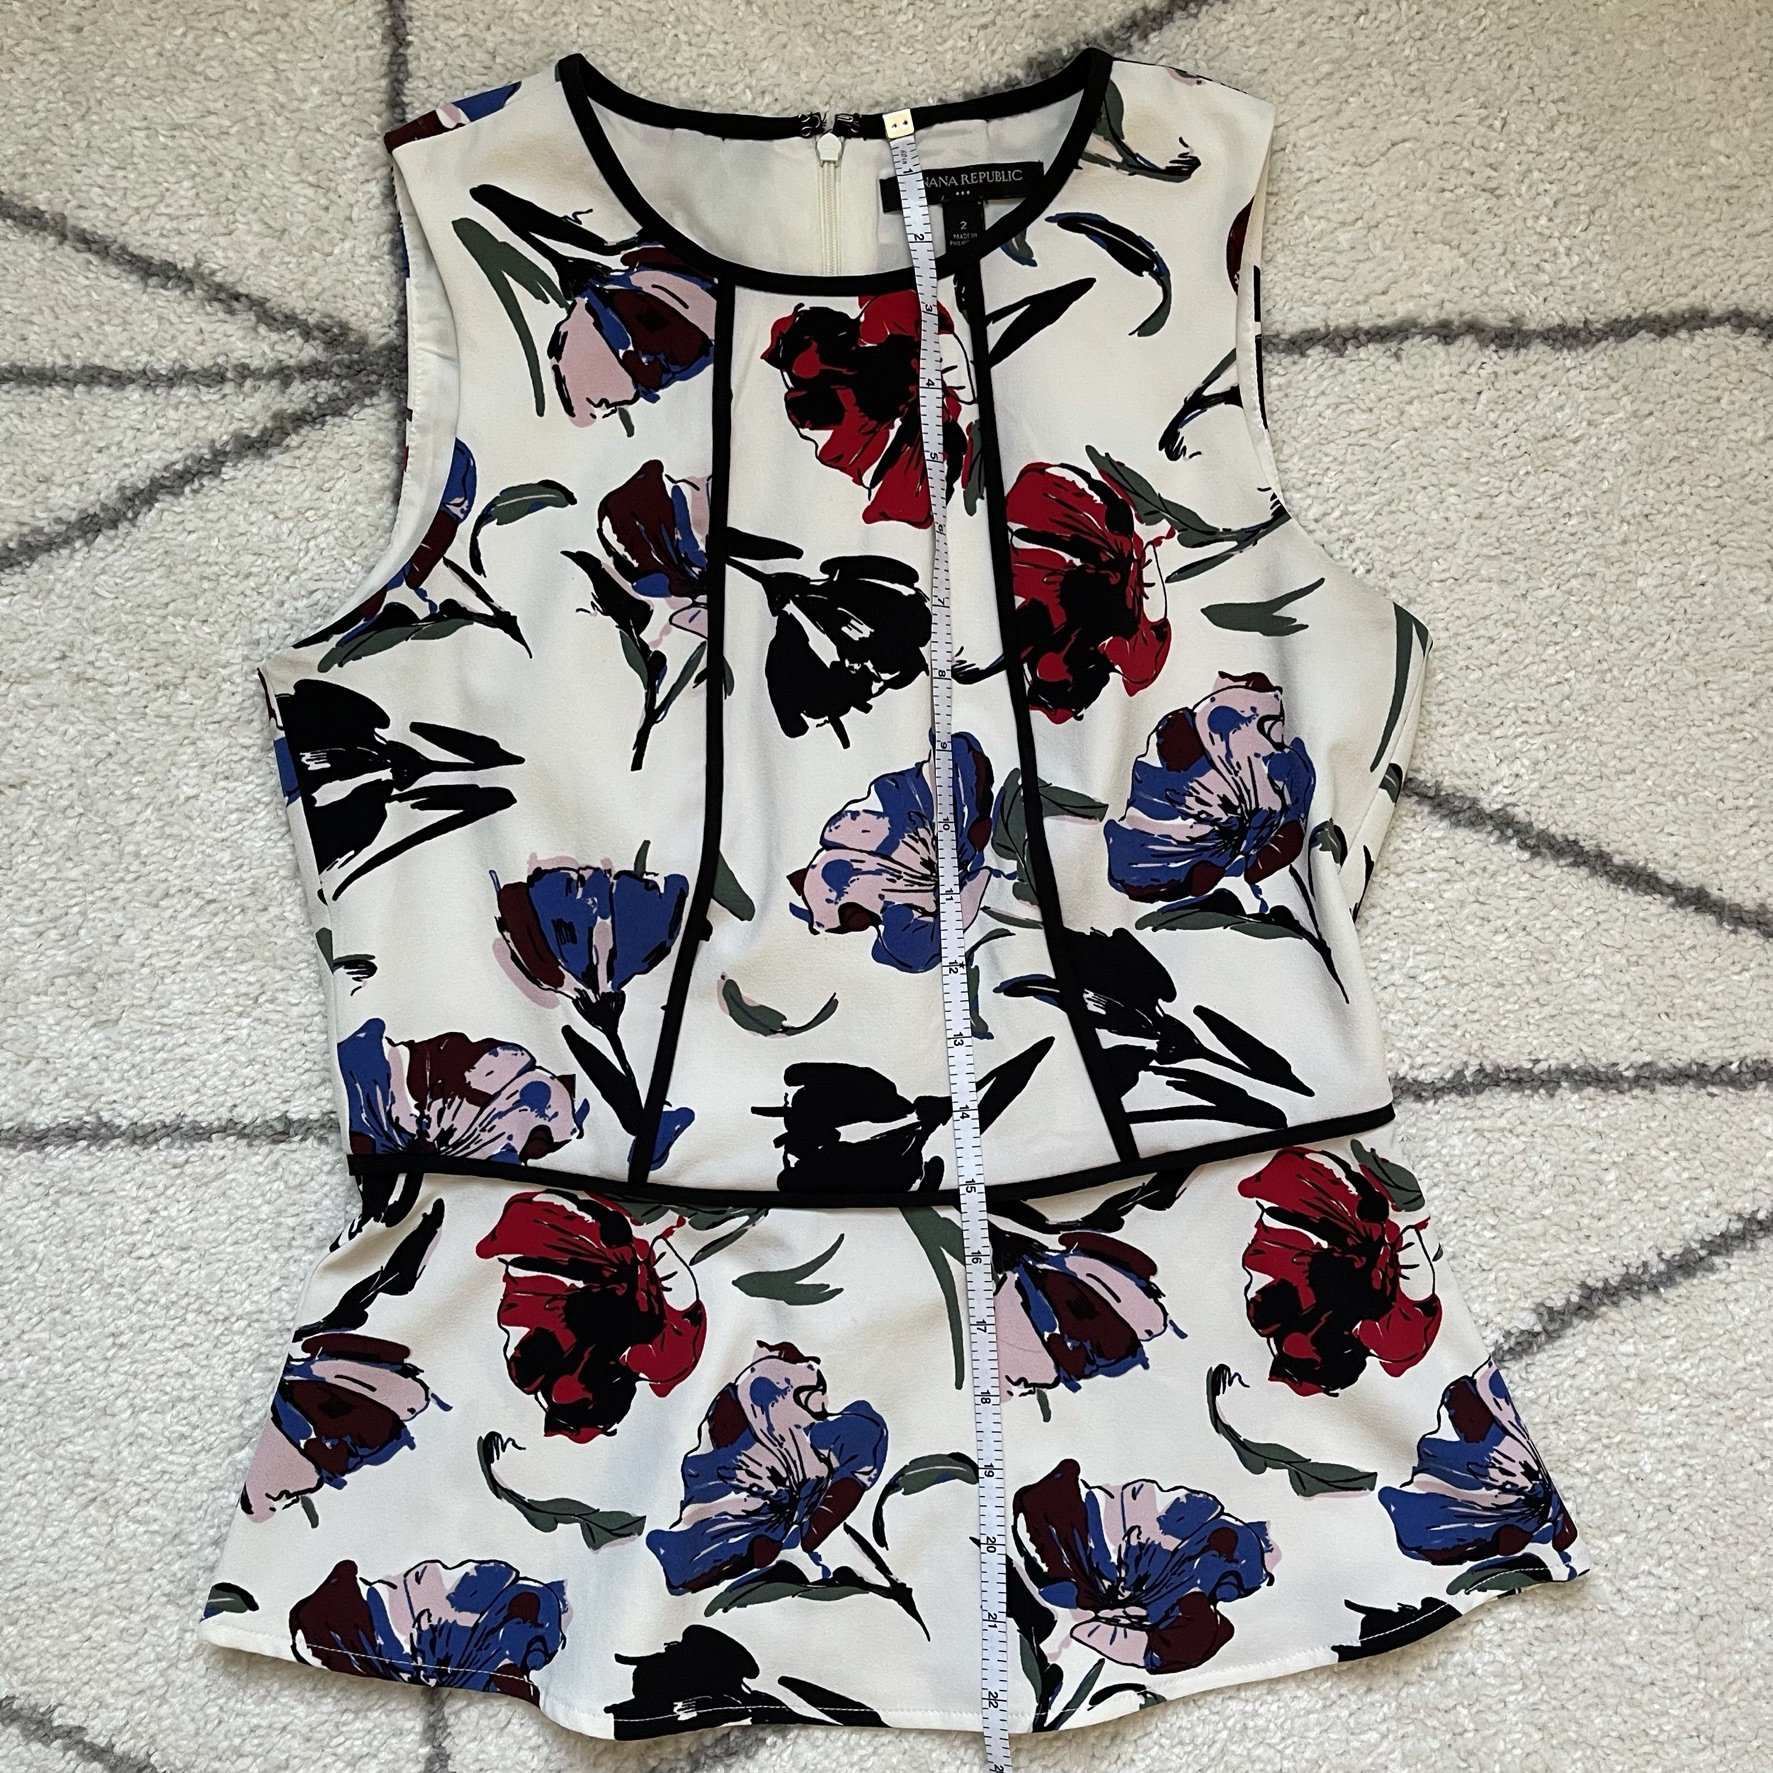
Key measurements with measuring tape
Close ups of any damage or wear
Bonus: Model photo to show fit
Take your photos in bright natural light against a neutral background. I take all my photos in the same place, right in front of a window on a white carpet. I always wait for sunny days to take my photos – it’s worth waiting for! Early on, I tried to “cheat” and take pictures when the conditions were not ideal, and I ended up going back to those items and redoing all the photos. Often, I will blitz photo taking of multiple items when it is sunny out, then create the listings later when I have more time.
I use my iPhone on the square photo setting so that my photos won’t get cropped when I upload to Poshmark; only square photos are allowed in the listings, and anything else is automatically cropped to square. I take all of my photos flat and make sure that there aren’t any folds or big wrinkles in the fabric.
I try my best to find a photo of the item on a model, usually from the brand’s website, since this helps buyers see fit and how the fabric may drape. It isn’t always easy to find these photos, though, so I consider them “bonus”. Technically these photos are also the property of the brand itself, so you could in theory be asked to remove them from your listing (though I have never heard of this happening). You could also take a picture of yourself in the garment, but in my case most of what I am selling doesn’t fit me properly!
Write a detailed description
My descriptions all follow the same format so that I make sure I am giving all the important information to my prospective buyers. Adding details to the text also helps with search optimization since people may be looking for a specific item or type of item. I keep a note in my phone of my template to copy and paste into each listing in my Poshmark app. You may find it helpful to create the listings from a computer instead of a phone since it is easier to type.
This is the format that I use for every listing:
Brand: This is the brand name of the item you are selling. This may seem redundant since the brand name has to be entered for every listing, but it allows you to add extra information since some stores have multiple house brands (Aritzia, Urban Outfitters, etc.) or sub brands (Banana Republic Monogram). For example, I may list an item as Aritzia and then have in my description Brand: Wilfred (Aritzia). All of this helps with search engine optimization.
Style: This is the style of the item. If you know the exact style that was/is listed on the brand’s website that is ideal, but otherwise I just describe the item. Again, this is all for search engine optimization.
Colour: This is the colour(s) of the item. I also use this to describe any patterns
Fabric: You should already have a photo of the tag with fabric contents, so this just allows that information to be searchable (like if someone is specifically looking for a cashmere sweater). I don’t usually add the %s unless it is 100% of a natural fabric
Size: This is the size listed on the tag of the item.
Condition: Terminology for condition is pretty universal, and I choose one of the following:
New with tag = brand new, never worn, and still has the tag attached
New without tag = brand new, never worn, but tag was removed
Excellent used condition (EUC) = worn, but looks like it’s new. Some people will also say “like new”
Good used condition = worn items that show normal signs of wear (minor pilling, thread pulls), but still have life to them. You can tell that it isn’t new, but the condition is still good. Many of my items fall into this category.
Used condition = worn items that show major signs of wear, like lots of pilling or holes.
Flatlay measurements: For shirts, add the measurements from pit-to-pit, at the waist, and the length from the back neck seam to the bottom hem. For pants, add measurements for waist, the front rise from the top to the crotch seam, the inseam from the crotch seam to the bottom hem, and the leg opening. All of these measurements should be taken with the item laid flat. I like to also include photos of the measurements so that buyers can see exactly how you measured your item (unfortunately, people do not always measure properly!). Make sure you state whether your measurements are in inches or centimeters.
Description: I write a short description of the item, like how it fits, what the fabric feels like, and any details about the item. You can potentially copy some of this from the brand website, but try to hone in on the information that seems relevant.
Flaws: Write down literally anything that is wrong with the piece. This should match what you have already shown in your pictures. Even if you think it is minor, include it! Buyers can’t make a return if something doesn’t fit, but they can claim that your item was not as described. The only way around this is to describe everything. If there are absolutely no flaws, include a sentence to state that. Buyers like to see a confirmation that the item is in perfect condition and may otherwise wonder whether you forgot to add details to your listing.
For my listing title, I follow a formula similar to the description: BRAND STYLE COLOUR SIZE. For example: “Lululemon Run For It jacket in black, size small”. Try not to make the listing title too long since it will appear truncated on the app. Make sure the brand name is first, since people are more likely to click on items from brands that they recognize. Not everyone uses brand filters when browsing Poshmark.
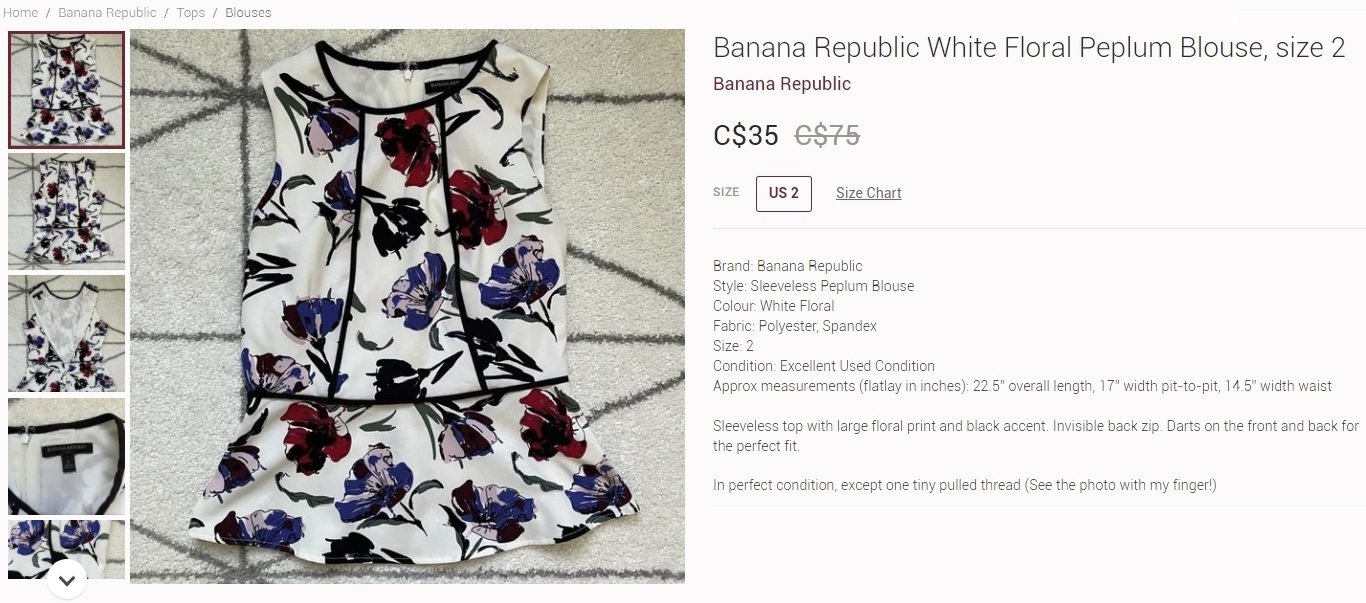
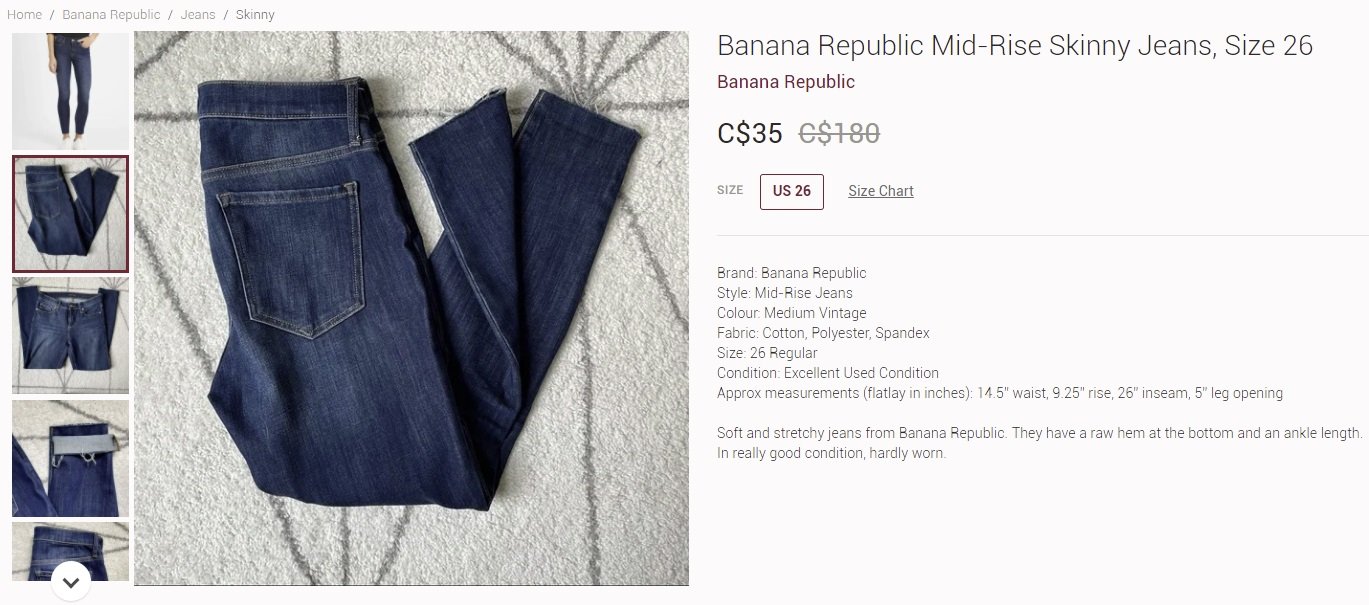
Here are two example listings for a blouse and a pair of jeans:
Fill in the listing details
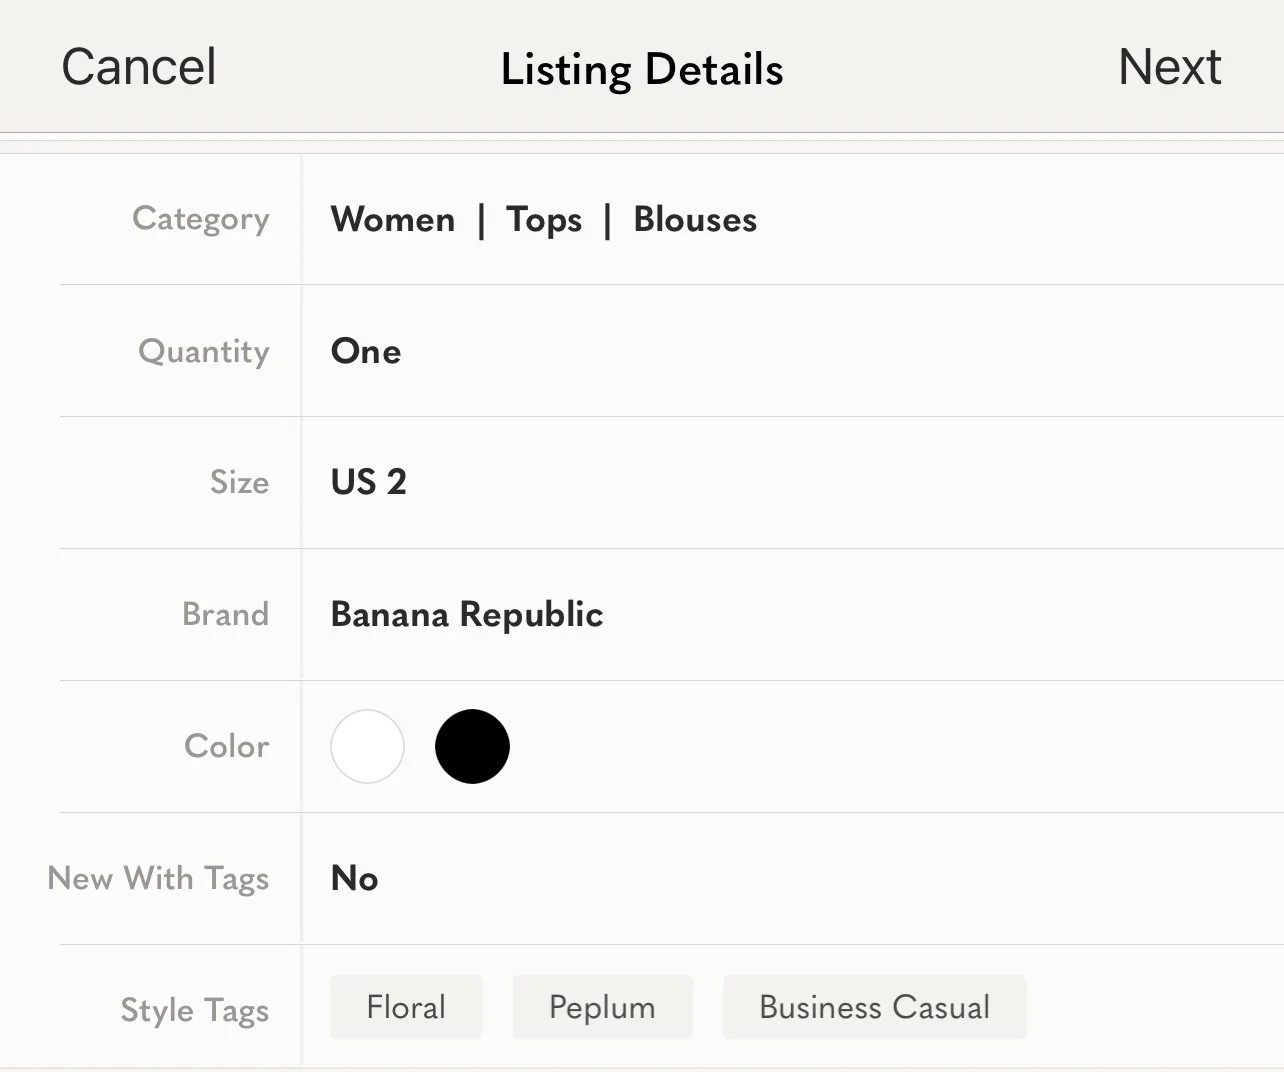
Listing Details should all be filled in to improve your item’s chance of appearing in search
To facilitate filtering in their app, Poshmark makes you select certain details about the item you are listing, like the brand and the size. Always include all of the information, even if optional, to help buyers find your item.
When selecting the size, make sure that the size reflects what is on the tag of your item not how you think the item fits. Having the incorrect size on your listing can be grounds for a buyer to return the item, even if you have the size tag in a photo and in your description! So if it is a petite size, make sure that is indicated (even if it fits regular!).
Note: Lululemon bras have a numbered size, but in Poshmark when you select “Sports Bra” as a category the app only allows you to use lettered sizes (S, M, L, etc.). I have gotten around this by listing these under “Women Tops” so that I can select the correct size. You can also add a custom size, but since most buyers filter listings by size they could be missing out on your item.
I haven’t found that “Tags” make any difference for my listings, but I do include them just in case.
Pricing your items
This is probably the most difficult part of selling on Poshmark. I have found that there is an aspect of psychology when it comes to pricing. Shockingly, items that are priced low do not necessarily sell better! Poshmark does a good job at suggesting prices based on the brand and category you have selected for your listing, and I usually list my items on the top end of the range they provide. You can also have a look at previously sold listings to get an idea of pricing by filtering for “Availability” = “Sold Items”. Keep in mind the condition of your item when you choose your price.
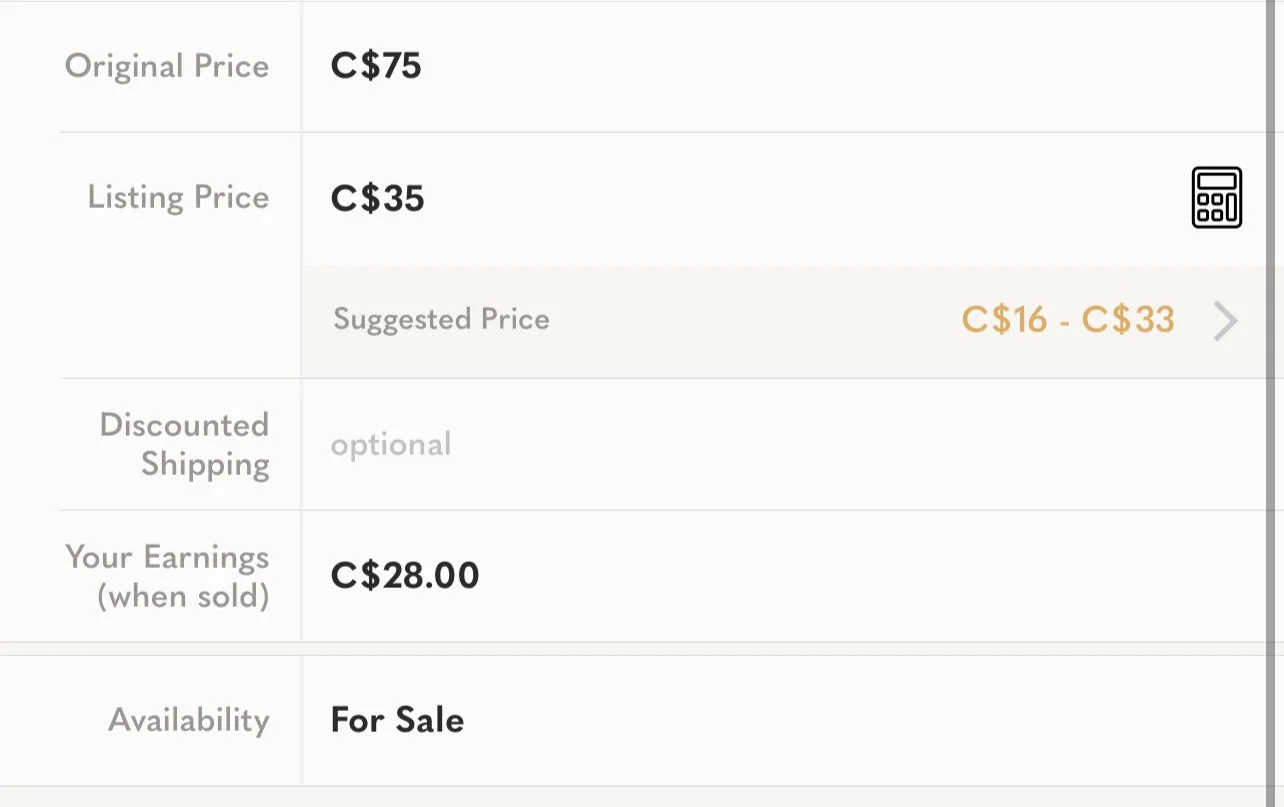
I price my items a bit higher than the “Suggested Price” since I expect buyers to make an offer lower than my listing price.
It is annoying, but you really do have to price your items a bit higher than you expect to sell them. 80% of my sales have come from “offers” rather than straight purchases, which means that I sell my items for less than I have them listed for. Once I realized this, I started pricing my items just a little higher. I also take every offer very seriously and try not to let greed or ego come into the picture. An accepted offer is guaranteed money in your pocket, and it often isn’t worth the risk to counteroffer to try to make $5 more. In my experience, most of the time when I make a counteroffer, I do not end up making the sale.
An example of pricing psychology that I like to keep in mind: I had a gently used Lululemon sports bra listed for $20. It was an older model and was not selling, no matter how much I made offers to likers. I decided to re-list it for $40, then made an offer for $30 to the first liker. She bought it!
Poshmark takes 20% of all sales you make. I appreciate that the app tells you exactly how much you will make (under the “Your Earnings” section) every time you list an item or send out an offer. You always know exactly what your profit will be for each sale.
How to ship your sold items
The buyer pays a flat fee of $13.49 for shipping, which takes the guess work out of pricing shipping (unlike other platforms like eBay or depop). Sellers can also make an “offer” to buyers with discounted shipping. In this case, the shipping discount is paid by the seller. That is, if you offer $3 off shipping, that $3 comes out of your profit.
As soon as a sale is made, Poshmark automatically emails a shipping label to the seller to print and affix to their package. I try to ship packages the next day, since we all know how annoying it is to wait for a package to arrive! You won’t be penalized if you are slow to ship, but Poshmark does show “average ship time” on your profile. I don’t think buyers pay much attention to this, but I figure I may as well do whatever I can to boost my chances of a sale. Poshmark gives you 4 days to ship before they send a reminder email, and after 8 days the buyer can cancel the order.
You just have to drop your package off at the post office or put it in a mailbox (if it will fit). I prefer to go directly to the post office since they will scan the package right away and it will show as shipped to the buyer. When I’m pressed for time, though, I will just put the package in my nearest mailbox knowing that it will take a bit longer for the package to be scanned.
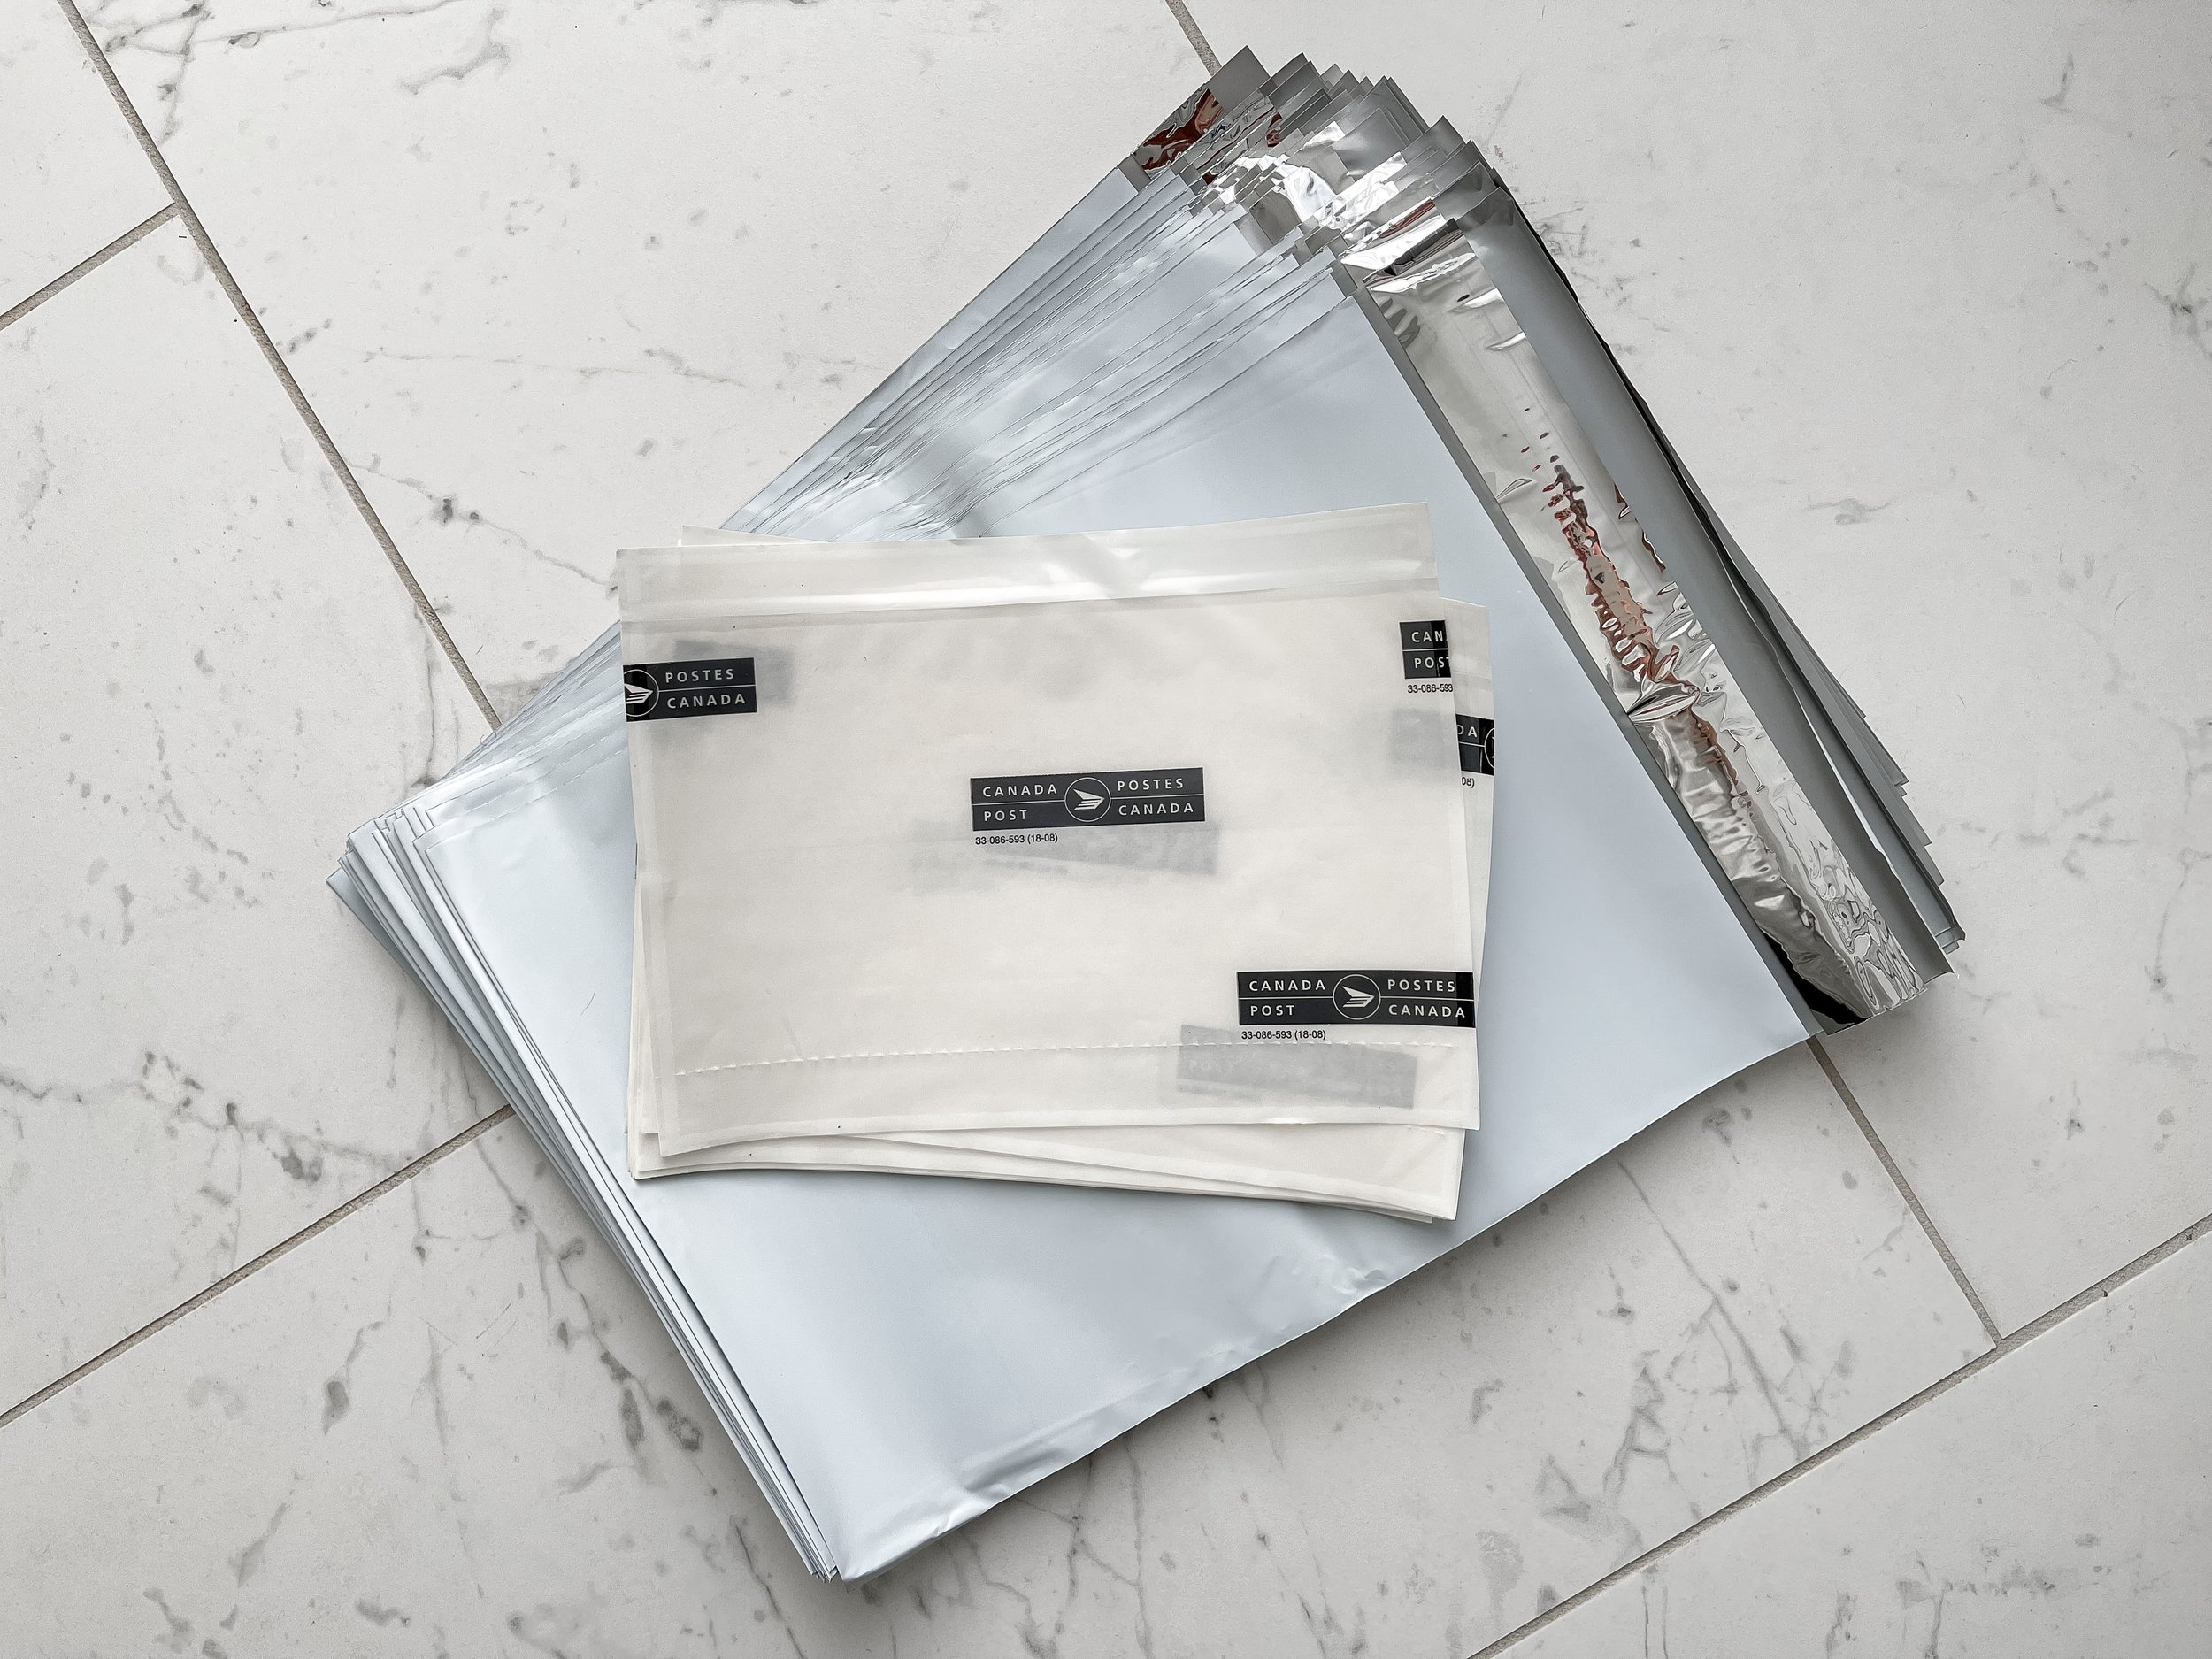
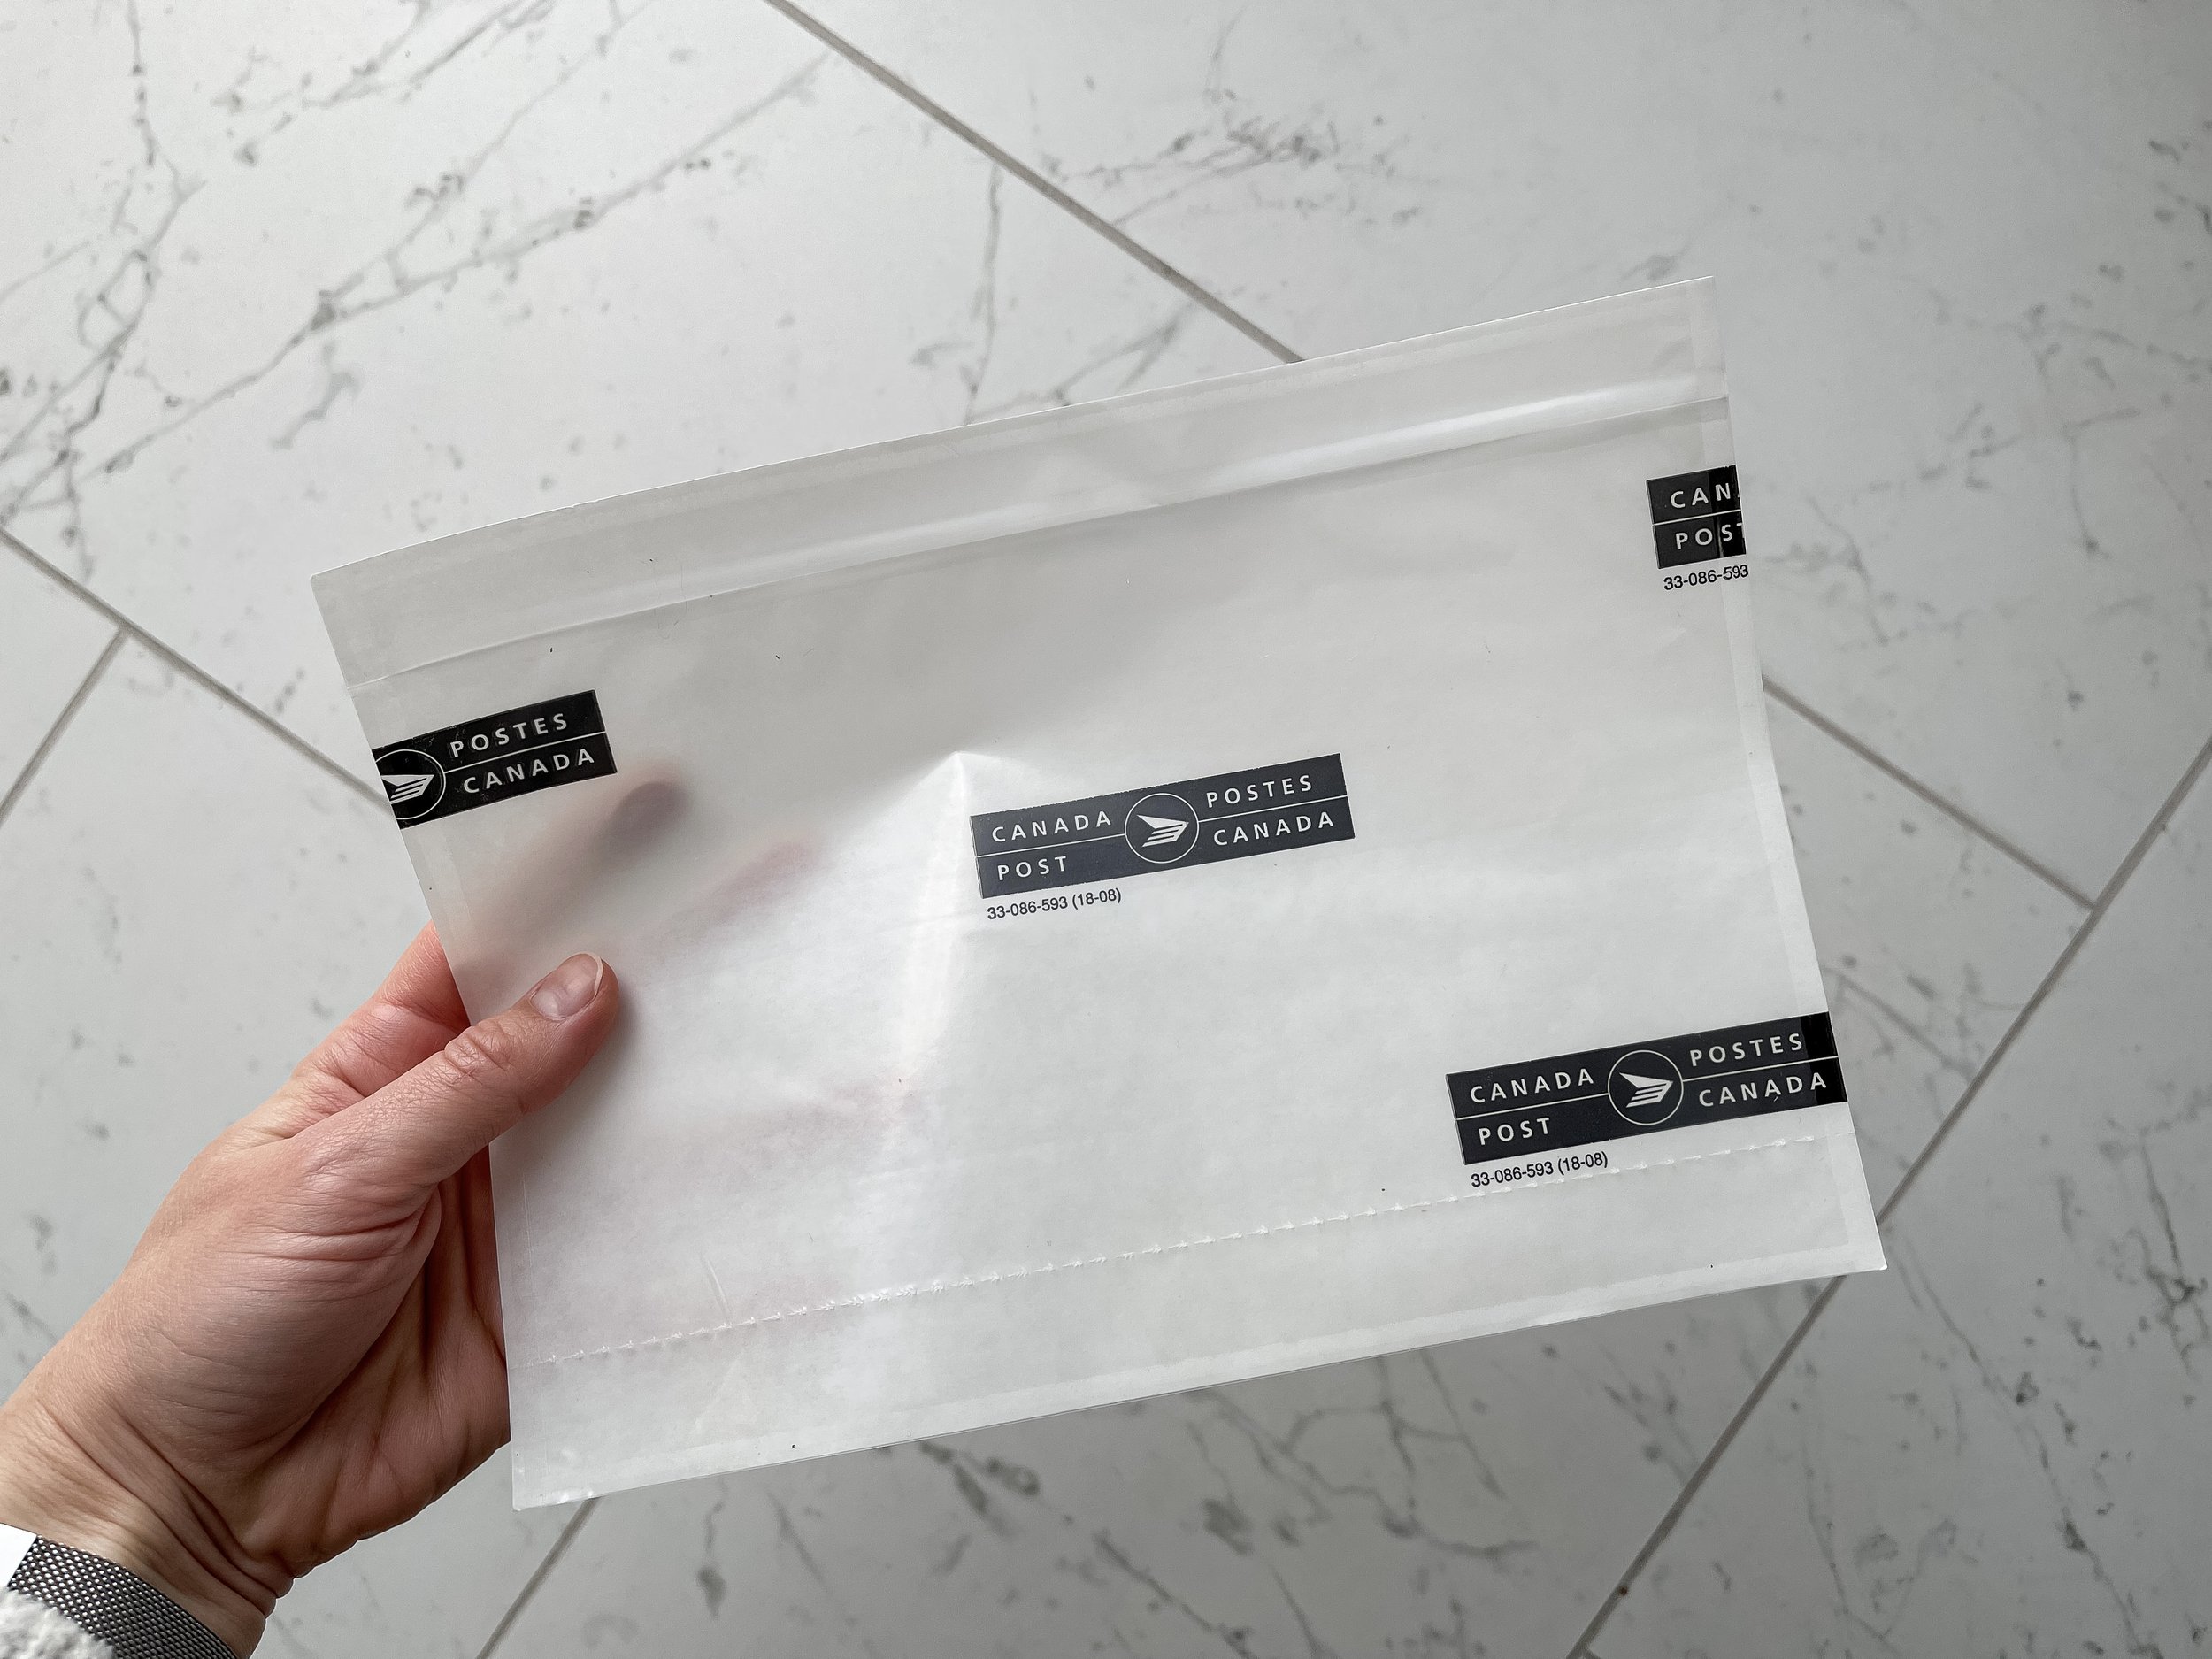
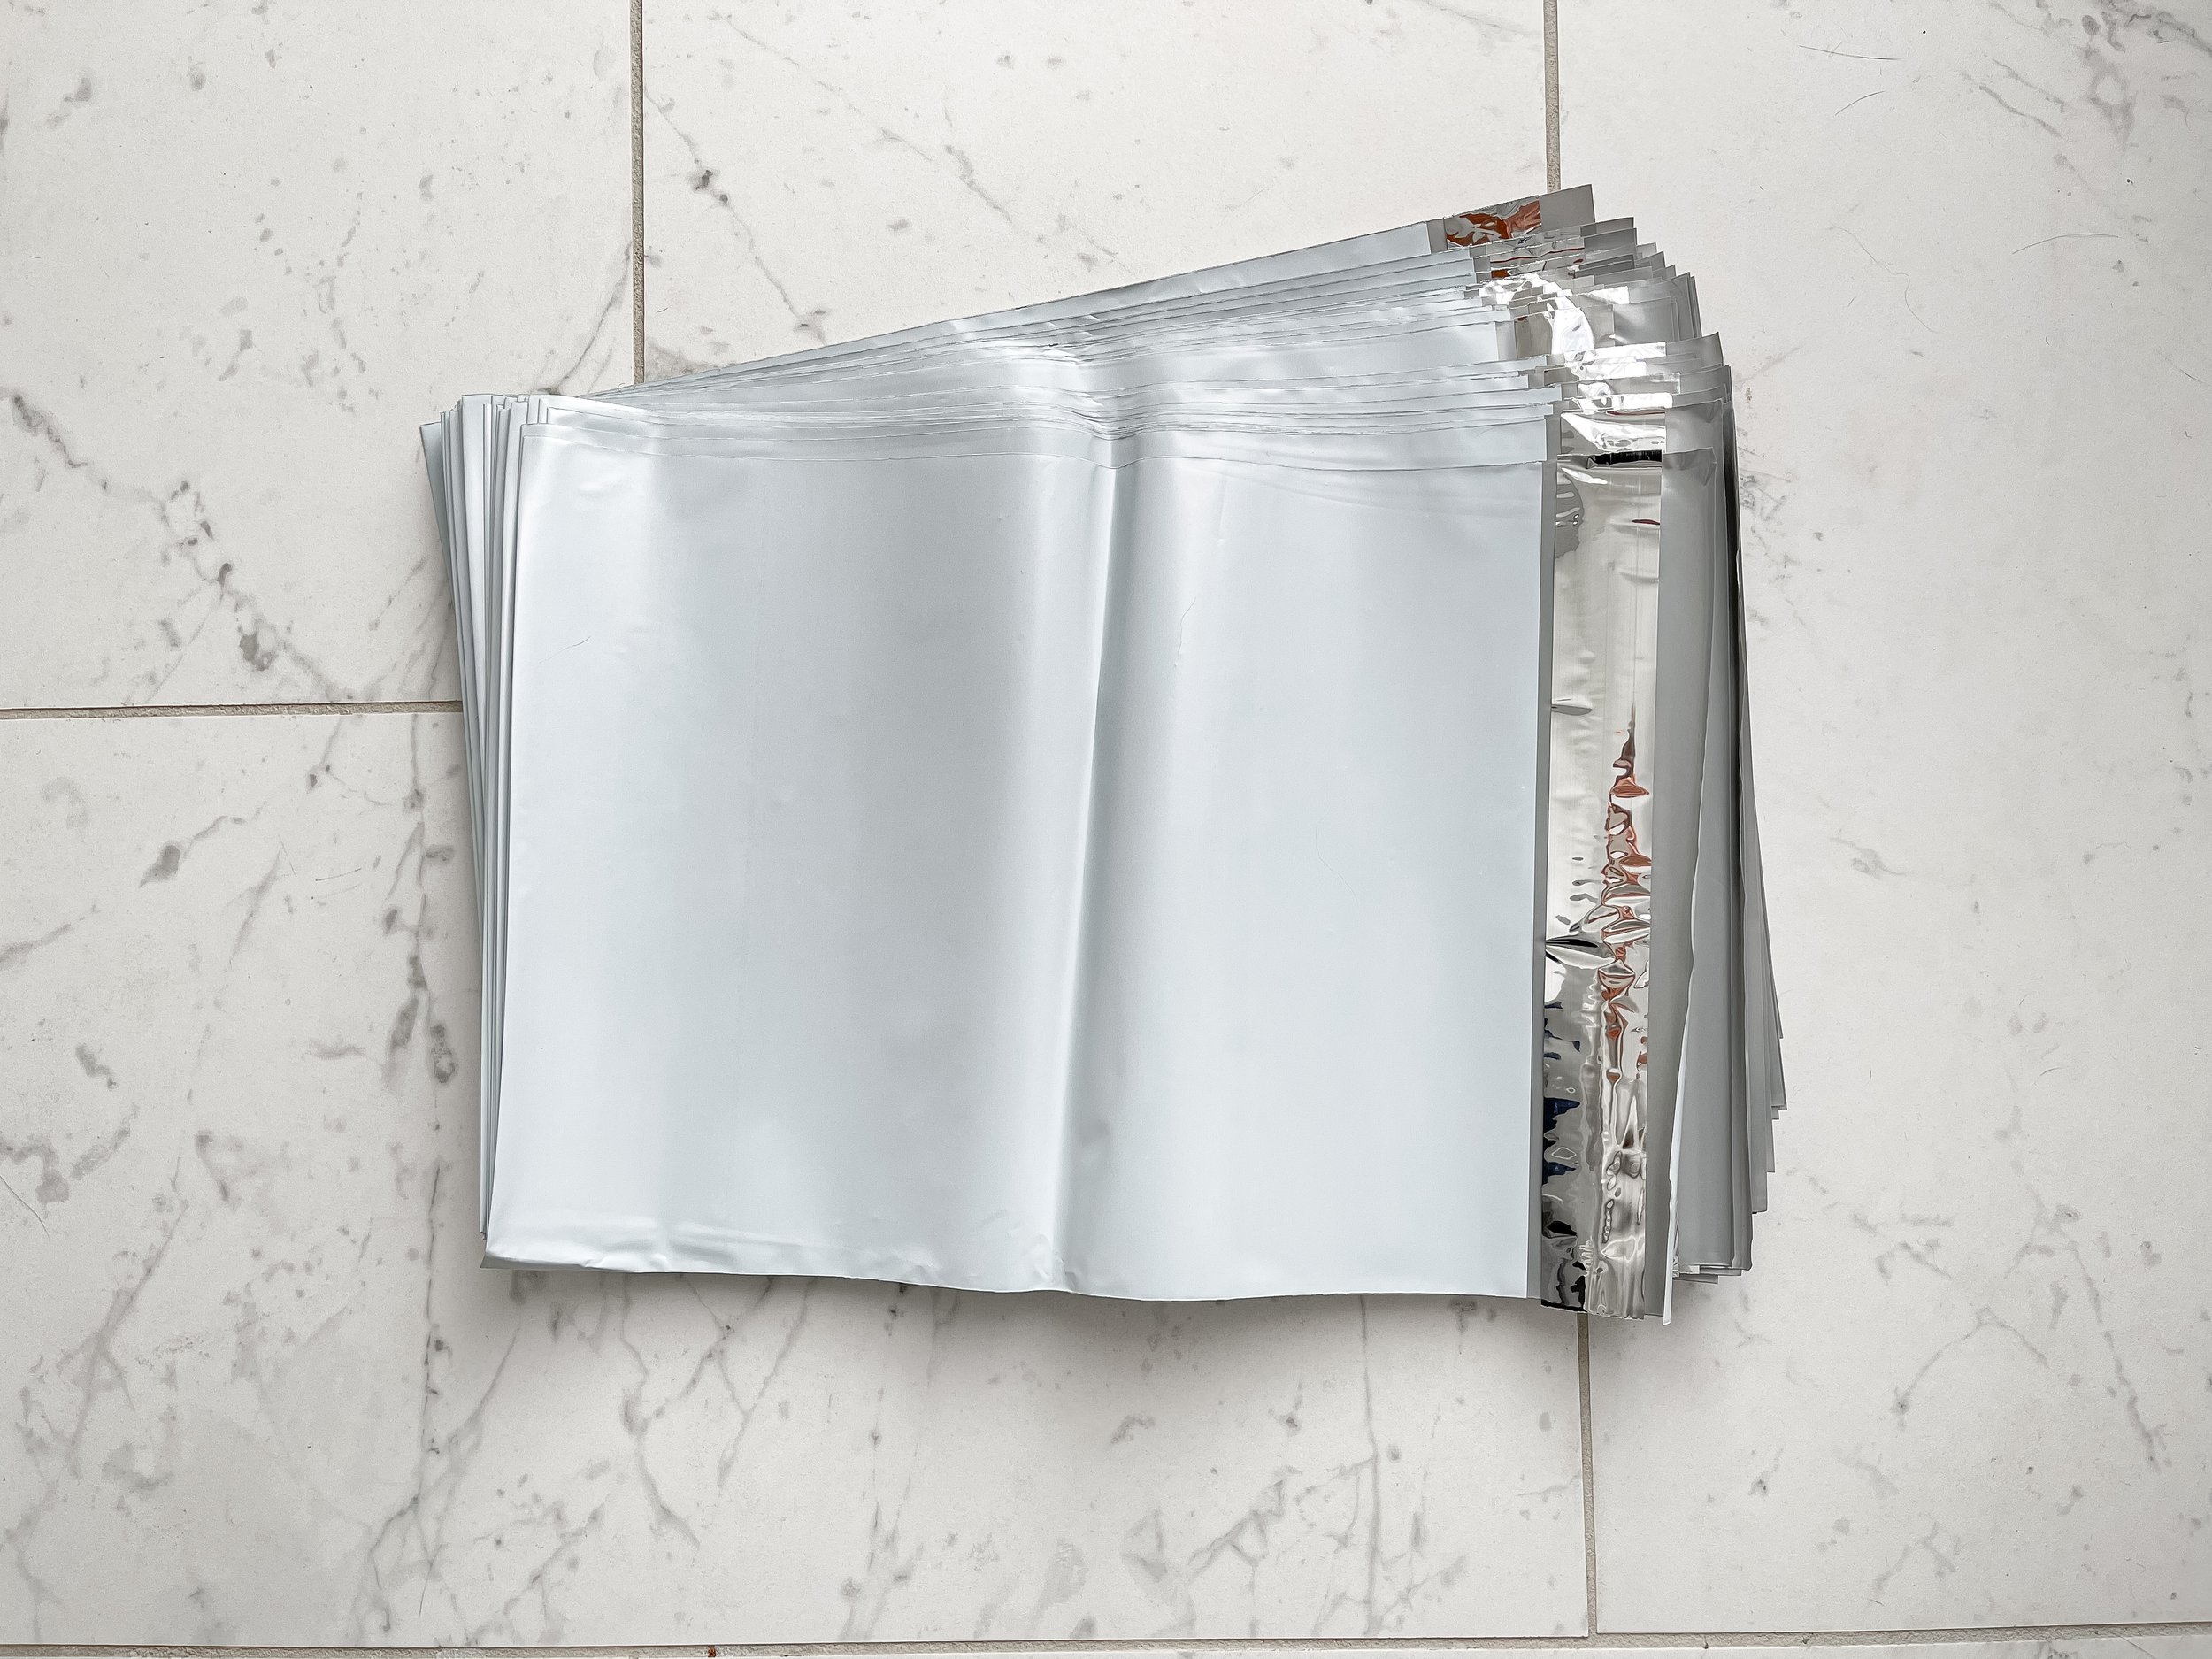
To facilitate the packing process, I buy plastic mailer envelopes (about 30 cents each) from my local post office. I also get clear-plastic self-adhesive label pouches (these are FREE from Canada Post!) to put the shipping label on the package. Neither of these things are necessary, but I find it just makes my life easier to not be searching for the right sized box or fighting with packing tape every time I make a sale.

How to send a message to a Poshmark user


There is no direct messaging within Poshmark, but there are some ways that you can get in touch with other users. A lot of people send messages by adding a comment to a listing with an @ mention to the user. This means that the comment will be visible to anyone who looks at that listing.
My preference is to send messages through the “Bundle” feature in the app. If you click on the username to see their profile, there is a little shopping bag icon at the top corner that will bring you to their bundles. I like to “Switch to Sell View"” and send my messages in there. This is how I send messages about a potential deal, or let the buyer know that I am delayed in shipping an item. One thing to note is that these are not private messages! Anyone can look at your bundles and see all of the messages you have sent, so do not add any personal information (like phone number or address) in these messages – not that you should be doing that anyway!
Is Closet Clear Out worth it?
In my experience, Closet Clear Out is not worth it.
Almost every weekend, Poshmark will do a “Closet Clear Out” event which means that if you decrease your listing price by 10% they will offer discounted shipping to buyers at no cost to you. The price has to be 10% lower than the lowest price you have had the item, and the shipping deal only stays up for 6 hours. This discounted price also has to be in the public listing, and does not apply to private offers or bundle offers!
I personally have not had much success with Closet Clear Out. On the contrary, I have found that buyers do not understand how the promotion works and end up sending me offers for even lower than my discounted price. Because of this, I have stopped participating in the Closet Clear Out events.
One thing that I have done before (with mixed success) is to send a message to “likers” on an item that I am willing to decrease the price by 10% to trigger the discounted shipping. I send something like this:
“Hello, I saw that you liked the Lululemon top in my closet! Poshmark is having a Closet Clear Out event right now, which means that if I decrease the price of my listing, you can have discounted shipping. Please let me know if you would be interested in this and we can figure out a price that works for both of us.”
Sometimes they respond, and sometimes they don’t! You also have no guarantee that they will actually purchase the item.
Is it worth it to become a Poshmark ambassador?
From my experience, it is not worth going through the effort to become a Posh Ambassador.
There are specific criteria that you have to meet to become a Poshmark ambassador. You can track your progress in the app by clicking on “My Posh Stats” from your profile. The hardest criterion to hit is to share 5000 items from others’ closets.
It took me 6 months to fulfill the criteria, and the next day I received an email from Poshmark letting me know I was an ambassador. I was so excited to have the Posh Ambassador badge on my profile! I have to admit that I have not noticed ANY difference in my sales since becoming an ambassador. I have a lot more followers now and my listings get shared a bit more often as a result, but this has not translated to more sales. The truth is that buyers will buy products that are well described/photographed, regardless of your status on the app.
Is it worth it to share listings?
When you share other people’s listings, they are likely to return the favour by sharing your listings. This increases visibility of your items, but does not necessarily translate to sales. I have gone through periods where I share a TON of listings and I have seen no impact on my sales. I would say skip this step and concentrate your time on creating amazing, detailed listings instead.
Definitely make sure that you are sharing YOUR listings every day, however. When buyers are scrolling through their searches, Poshmark defaults the sorting to be sorted by most recently shared. That means that your item will show up closer to the top if you have shared it recently. It also refreshes the date/timestamp on your listing so that buyers know that you are active.
How to re-list stale listings
Sometimes, items just don’t sell. You can have a perfect listing that gets a bunch of likes, but no one seems to be sending you offers or accepting your offers. Every month or so I will go through and re-list some of my older items. This clears out the likes (i.e., the people who didn’t buy your item even when you sent out offers!) and pushes the listing to the top of people’s feeds. I take this opportunity to switch out the cover photo of the listing, and potentially re-price the listing.
The easiest way to re-list an item is to open the listing, click “Edit”, then click “Copy Listing” at the bottom of the page. You just have to remove “COPY --” from the title and make any updates you want. Once you click post, just make sure you go back to the original listing you just copied and delete it. You don’t want to have duplicate listings in your account!
Some people will argue that it’s only worth re-listing after 3 months because of the way Poshmark tags the age of your listings, but I have found that this can be effective for me even after 3-4 weeks.
How to cash out your earnings
Hooray, you’ve sold some items! After a sale, you can see your earnings under “My Balance” in your profile. Any funds from items that are sold but not received by the buyer yet will appear under “Pending”, whereas sales that have been accepted by the buyer will appear under “Redeemable”. You can use your redeemable balance to buy items from other sellers, or you can withdraw this directly to your bank account!
To withdraw your balance, you will have to connect Poshmark to your bank account. You will have to enter details like the type of account, your bank account number, and your bank’s transit. Once this is done, the funds can be direct deposited to your bank account. It takes about 2 days for the money to appear in your account, and there are no transaction fees for withdrawal. It’s so easy!
I love that Poshmark has allowed me to make a bit of extra money selling clothing that I am not wearing anymore. Discovering this app has made me way more likely to buy second hand items, as well, which makes me feel good about my impact on the environment.
What are you waiting for, go sell your closet on Poshmark! And if you use my referral code HAHLGREN you will receive $15 off your first purchase.